
Loading article…
| 第二次ボーア戦争 | |||||||||
|---|---|---|---|---|---|---|---|---|---|
| アフリカ分割中のボーア戦争の一部 | |||||||||
 左上から時計回りに:
| |||||||||
| |||||||||
| 交戦国 | |||||||||
|
| |||||||||
| 指揮官とリーダー | |||||||||
 ロバート・ガスコイン・セシル ジョセフ・チェンバレン アルフレッド・ミルナー フレデリック・ロバーツ ウィリアム・ロバートソン ポール・メシューエン レッドヴァース・ブラー ハーバート・キッチェナー ルドルフ・ランバート ロバート・ベーデン・パウエル ハーバート・プラマー ロバート・ガスコイン・セシル ジョセフ・チェンバレン アルフレッド・ミルナー フレデリック・ロバーツ ウィリアム・ロバートソン ポール・メシューエン レッドヴァース・ブラー ハーバート・キッチェナー ルドルフ・ランバート ロバート・ベーデン・パウエル ハーバート・プラマー.svg/500px-Flag_of_Canada_(1868%E2%80%931921).svg.png) フランソワ=ルイ・レサール フランソワ=ルイ・レサール.svg/500px-Flag_of_Australia_(1901%E2%80%931903).svg.png) ウォルター・タンブリッジ ウォルター・タンブリッジ |
 ポール・クルーガー クース・デ・ラ・レイ ルイス・ボタ シャルク・W・バーガー ピエト・クロニエ ( POW ) ピエト・ジュベール ヤン・スマッツ ポール・クルーガー クース・デ・ラ・レイ ルイス・ボタ シャルク・W・バーガー ピエト・クロニエ ( POW ) ピエト・ジュベール ヤン・スマッツ マルティヌス・ステイン クリスティアーン・デ・ウェット マルティヌス・ステイン クリスティアーン・デ・ウェット | ||||||||
| 強さ | |||||||||
|
イギリス軍: 347,000人 植民地軍: 103,000~153,000人 アフリカ補助軍: 100,000人[4] |
ボーア人コマンド部隊:トランスヴァール・ボーア人 25,000人、フリーステート・ボーア人15,000人、ケープ・ボーア人6,000~7,000人[5]、アフリカ人補助部隊: 10,000人[4]、外国人義勇兵: 5,400人以上[要出典] | ||||||||
| 死傷者と損失 | |||||||||
|
22,092人が死亡[c] 75,430人が病気または負傷して帰国[7] 934人が行方不明 合計: ~99,284 |
6,189人死亡[d] 24,000人が捕虜(海外に送られた)[要出典] 21,256人が降伏(戦争終了時)[7] 合計: ~51,445 | ||||||||
|
民間人の死傷者: 46,370人死亡、 26,370人のボーア人の女性と子供が強制収容所で死亡、 115,000人のうち20,000人以上のアフリカ人が別の強制収容所に収容された。[要出典] | |||||||||
.svg/500px-Flag_of_the_Cape_Colony_(1876%E2%80%931910).svg.png)
.svg/500px-Flag_of_the_Natal_Colony_(1875%E2%80%931910).svg.png)


.svg/500px-Flag_of_Ceylon_(1875%E2%80%931948).svg.png)

.svg/500px-Flag_of_Germany_(1867%E2%80%931918).svg.png)
.svg/500px-Jack_of_Sweden_and_Norway_(1844%E2%80%931905).svg.png)
.svg/500px-Flag_of_Leinster_(bright).svg.png)
_crowned.svg/500px-Flag_of_Italy_(1861-1946)_crowned.svg.png)
.svg/500px-Royal_Standard_of_the_Tsar_of_Poland_(1815%E2%80%931830).svg.png)
.svg/500px-Flag_of_France_(1794%E2%80%931815,_1830%E2%80%931974,_2020%E2%80%93present).svg.png)
.svg/500px-Flag_of_Australia_(converted).svg.png)
.svg/500px-Flag_of_Belgium_(civil).svg.png)

.svg/500px-Flag_of_the_United_States_(1896%E2%80%931908).svg.png)
.svg/500px-Flag_of_Austria-Hungary_(1867%E2%80%931918).svg.png)
第二次ボーア戦争(アフリカーンス語:Tweede Vryheidsoorlog、直訳すると「第二次自由戦争」、1899年10月11日 - 1902年5月31日)は、ボーア戦争、トランスヴァール戦争、[8]英ボーア戦争、あるいは南アフリカ戦争としても知られ、イギリス帝国と2つのボーア共和国(南アフリカ共和国とオレンジ自由国)の間で、帝国の南部アフリカにおける影響力をめぐって戦われた紛争である。
ウィットウォーターズランドのゴールドラッシュにより、南アフリカ共和国に大量の「外国人」が流入した。その多くはケープ植民地からのイギリス人だった。彼らは投票権を与えられず、「歓迎されない訪問者」とみなされたため、ケープのイギリス当局に抗議した。交渉は1899 年 6 月のブルームフォンテン会議で決裂した。10 月にボーア人の非正規軍と民兵がイギリス植民地の入植地を攻撃し、紛争が勃発した。ボーア人はレディスミス、キンバリー、マフェキングを包囲し、コレンソ、マガーズフォンテン、ストームバーグで勝利を収めた。英国陸軍兵士の数が増え、南アフリカに派遣され、ボーア人に対する攻撃を仕掛けたが、失敗に終わった。
しかし、イギリス軍の指揮官レドヴァース・ブラー将軍がロバーツ卿とキッチナー卿に交代すると、イギリスの運命は一変した。彼らは包囲されていた都市を解放し、1900年初頭に18万人の遠征軍を率いてボーア共和国に侵攻した。ボーア人は、これほどの大軍に抵抗できないと悟って激しい戦闘を控え、イギリス軍は両共和国とその首都プレトリアとブルームフォンテーンを占領することができた。[9] [10] [11]南アフリカ共和国の大統領 ポール・クルーガーを含むボーア人の政治家は逃亡するか身を潜め、イギリス帝国は1900年に両共和国を正式に併合した。イギリスでは、ソールズベリー卿率いる保守党内閣がイギリス軍の成功に乗じて早期の総選挙を実施したが、当時の観察者からは「カーキ色選挙」と呼ばれた。しかし、ボーア人の戦士たちは丘に登りゲリラ作戦を開始し、ビタレインダーとして知られるようになった。ルイ・ボタ、ヤン・スマッツ、クリスティアン・デ・ヴェット、クース・デ・ラ・レイなどの将軍に率いられたボーア人のゲリラは、 2年間にわたってイギリス軍に対してヒット・アンド・ラン攻撃や待ち伏せ攻撃を行った。[12] [13]
ゲリラ作戦は、イギリス軍がゲリラ戦術に不慣れであったことと、民間人の間でゲリラへの広範な支援があったため、打ち負かすのが困難であることが判明した。ゲリラを倒すことの失敗に対応して、イギリス軍最高司令部は、大規模で多方面にわたる対反乱作戦の一環として焦土作戦を命じ、網、ブロックハウス、拠点、有刺鉄線のフェンスのネットワークが構築され、占領された共和国を事実上分割した。10万人を超えるボーア人民間人(ほとんどが女性と子供)が強制的に強制収容所に移送され、そこで2万6千人が主に飢餓と病気で死亡した。黒人アフリカ人はボーア人に物資を供給できないように強制収容所に収容され、2万人が死亡した。[14]イギリス騎馬歩兵がゲリラを追跡するために展開され、小規模な小競り合いが発生した。どちらの側も戦闘で命を落とした戦闘員はほとんどおらず、ほとんどの死傷者は病死した。キッチナーは紛争を終わらせるために、残っていたボーア人指導者たちに寛大な降伏条件を提示した。仲間のボーア人を収容所から解放したいと考えたボーア人指揮官のほとんどは、フェリーニヒング条約でイギリスの条件を受け入れ、1902年5月に降伏した。[15] [16]旧共和国はトランスヴァールとオレンジ川のイギリス植民地となり、1910年にナタールおよびケープ植民地と合併して、イギリス帝国内の自治領である南アフリカ連邦を形成した。 [17]
イギリスの遠征活動は、ケープ植民地、ナタール、ローデシアの植民地軍[18]と、特にオーストラリア、カナダ、インド、ニュージーランドなど世界中の大英帝国からの多くの志願兵によって大きく支援された。黒人アフリカ人の新兵は、イギリスの戦争活動にますます貢献した。国際世論はボーア人に同情的で、イギリスには敵対的だった。イギリス国内でさえ、戦争に対する大きな反対があった。その結果、ボーア人の大義は、ドイツ帝国、アメリカ、ロシア、さらにはオーストラリアやアイルランドなど大英帝国の一部を含む中立国から何千人もの志願兵を引き付けた。 [19]戦争の驚くべき長期化とイギリスが被った予期せぬ損失により、この戦争は大英帝国の絶対的な世界支配の見せかけに疑問が生じ始めたと考える人もいる。[20]民間人や捕虜の殺害を含む、戦争中に犯されたイギリスの戦争犯罪の裁判は、1901年1月に開かれた。
概要

戦争は3つの段階に分かれた。第1段階では、ボーア人がナタールとケープ植民地のイギリス領に先制攻撃を仕掛け、レディスミス、マフェキング、キンバリーのイギリス軍守備隊を包囲した。その後、ボーア人はストームベルク、マガーズフォンテン、コレンソ、スピオンコップで一連の戦術的勝利を収めた。
第二段階では、ロバーツ卿の指揮下でイギリス軍の兵力が大幅に増強された後、イギリス軍は1900年に包囲を解くために再度攻勢を開始し、今度は成功を収めた。ナタールとケープ植民地が確保された後、イギリス軍はトランスヴァールに侵攻することができ、共和国の首都プレトリアは最終的に1900年6月に占領された。
1900年3月に始まり、さらに2年間続いた第3段階と最終段階では、ボーア人は激しいゲリラ戦を展開し、イギリス軍の部隊、電信所、鉄道、倉庫を攻撃した。ボーア人ゲリラへの補給を断つため、キッチナー卿の指揮下にあったイギリス軍は焦土作戦を採用した。彼らは広大な地域を掃討し、ボーア人の農場を破壊し、民間人を強制収容所に移送した。[21] : 439–495
英国の一部の報道機関と英国政府は、数か月以内に作戦が終わると予想し、特に強制収容所の状況(26,000人ものアフリカーナーの女性と子供が病気と栄養失調で死亡した)に関する暴露を受けて、長引いた戦争に対する支持は徐々に薄れていった。1902年5月31日土曜日、ボーア軍はついに降伏し、トランスヴァールとオレンジ自由国の代表60人のうち54人が平和条約の条項を受け入れることに投票した。[22] : 97 これはフェアニヒング条約として知られ、その条項により、2つの共和国は将来的に自治権を持つことが約束され、大英帝国に吸収された。この約束は1910年の南アフリカ連邦の設立で果たされた。
この戦争は、この地域とイギリス国内の政治に永続的な影響を及ぼした。イギリスにとって、第二次ボーア戦争は1815年から1914年までで最も長く、最も費用がかかり(2億1100万ポンド、2022年の価格で199億ポンド)、最も血なまぐさい戦争であった[21] 。 戦争はクリミア戦争(1853年 - 1856年)よりも3か月長く続き、イギリス軍の戦闘死傷者も多かった。クリミア戦争では疫病による犠牲者が多く、17,580人のイギリス軍が死亡した[23] 。
名前

この戦争は、第一次ボーア戦争(1880年12月から1881年3月)の方がはるかに小規模だったため、単に「ボーア戦争」と呼ばれることが多い。ボーア(「農民」の意)は、喜望峰に最初に移住したオランダ東インド会社の子孫である、アフリカーンス語を話す南アフリカの白人を指す一般的な呼び名である。南アフリカ人の中には、この戦争を(第二次)アングロ・ボーア戦争と呼ぶ者もいる。アフリカーンス語では、(使用頻度の高い順に)「Tweede Vryheidsoorlog(第二次自由戦争)」、「Tweede Boereoorlog(第二次ボーア戦争)」、 「 Anglo–Boereoorlog(アングロ・ボーア戦争)」、または「 Engelse oorlog(イングランド戦争)」と呼ばれることがある。[24]
南アフリカでは、この戦争は正式には南アフリカ戦争と呼ばれています。[25]実際、2011年のBBCの報道によると、「ほとんどの学者は1899年から1902年の戦争を南アフリカ戦争と呼ぶことを好み、それによって白人、黒人を問わずすべての南アフリカ人が戦争の影響を受け、その多くが参加者であったことを認めています」[26] 。
起源
戦争の起源は複雑で、ボーア人とイギリスの間の1世紀以上にわたる紛争に端を発していました。しかし、差し迫った重要性は、1884年6月にヤン・ゲリット・バンチェスによって発見された非常に収益性の高いウィットウォーターズランド金鉱山[21] : xxiを 誰が管理し、そこから最も利益を得るかという問題でした。
南アフリカにおける最初のヨーロッパ人入植地は1652年に喜望峰に設立され、その後オランダのケープ植民地の一部として管理された。[27]ケープは18世紀後半に破産するまでオランダ東インド会社によって統治され、その後はオランダによって直接統治された。[28]オランダの政治的混乱の結果、イギリスはナポレオン戦争中に3度ケープを占領し、 1806年のブラウベルクの戦いでイギリス軍がオランダを破った後、占領は恒久的となった。[29]当時、この植民地にはオランダの支配下で定住した約26,000人の入植者が住んでいた。[30]比較的大多数は17世紀後半から18世紀初頭にケープに連れてこられた古いオランダ人の家族であったが、この人口のほぼ4分の1はドイツ系で、6分の1はフランス系ユグノーの子孫であった。[31]分裂は民族的線よりも社会経済的線に沿って起こる可能性が高かった。大まかに言えば、入植者にはボーア人を含むいくつかの異なるサブグループが含まれていた。[32]ボーア人は植民地の辺境に住み、家畜のためのより良い牧草地を求めていた移動農民だった。[28]多くはイギリスの統治、特に1834年12月1日のイギリスによる奴隷制度廃止に不満を持っていた。強制労働を強いられたボーア人は奴隷に対する補償金を受け取ることができなかっただろう。[33] 1836年から1852年の間に、多くの人がグレート・トレックとして知られるようになるイギリス統治からの移住を選んだ。[29]
約15,000人のボーア人がケープ植民地を出発し、東海岸に沿ってナタールに向かった。1843年にイギリスがナタールを併合した後、彼らはさらに北上して南アフリカの広大な東部内陸部へと旅した。そこで彼らは2つの独立したボーア共和国、南アフリカ共和国(1852年、トランスヴァール共和国としても知られる)とオレンジ自由国(1854年)を建国した。イギリスは1852年と1854年にこの2つのボーア共和国を承認したが、1877年にイギリスがトランスヴァールを併合しようとしたことで、1880年から1881年にかけて第一次ボーア戦争が勃発した。イギリスが特にマジュバ・ヒルの戦い(1881年)で敗北した後、2つの共和国は一定の条件の下で独立を回復した。しかし、関係は不安定なままであった。
1866年、キンバリーでダイヤモンドが発見され、ダイヤモンドラッシュが起こり、オレンジ自由国の国境に大量の外国人が流入した。その後、1884年6月、南アフリカ共和国のウィットウォーターズランド地域でヤン・ヘリット・バンチェスが金を発見した。金によってトランスヴァールは南アフリカで最も豊かな国となったが、この国には自力で資源を開発する人材も産業基盤もなかった。その結果、トランスヴァールは、富と仕事を求めてボーア地域にやってきた主にイギリスからの英語を話す外国人、つまりアイトランダーの移民をしぶしぶ受け入れた。その結果、トランスヴァールのアイトランダーの数はボーア人の数を上回る恐れがあり、ボーア人入植者と新しい非ボーア人入植者との対立が激化した。
イギリスの拡張主義思想(特にセシル・ローズによって広められた)と、アイトランダーの政治的・経済的権利をめぐる争いが、1895年のジェイムソン襲撃の失敗につながった。襲撃を指揮したレアンダー・スター・ジェイムソン博士は、ヨハネスブルグのアイトランダーの蜂起を奨励するつもりだった。しかし、アイトランダーは武器を取って支援せず、トランスヴァール政府軍はジェイムソンの部隊を包囲し、彼らがヨハネスブルグに到着する前に捕らえた。[21] : 1–5
緊張が高まるにつれ、政治的駆け引きと交渉により、南アフリカ共和国内でのアイトランダーの権利、金鉱業の支配、トランスヴァールとオレンジ自由国を英国支配下の連邦に組み入れるという英国の希望といった問題で妥協点を見出そうとした。アイトランダーの大多数が英国系であること、そしてヨハネスブルグに新たなアイトランダーが続々と流入していることから、ボーア人はアイトランダーに完全な投票権を与えると、南アフリカ共和国におけるボーア民族の支配が最終的に失われることを認識していた。
1899年6月のブルームフォンテーンでの交渉は失敗に終わり、1899年9月、イギリス植民地大臣 ジョセフ・チェンバレンがトランスヴァールに住むアイトランダーズに完全な投票権と代表権を要求した。南アフリカ共和国大統領ポール・クルーガーは1899年10月9日に最後通牒を出し、イギリス政府に48時間以内にトランスヴァールとオレンジ自由国の国境から全軍を撤退させ、それができない場合はオレンジ自由国と同盟を組んだトランスヴァールがイギリス政府に宣戦布告するとした。(実際、クルーガーは9月初旬にコマンド部隊にナタール国境に派遣するよう命じており、イギリスは国境から遠く離れた駐屯地の町にしか軍を配置していなかった。)[34]イギリス政府は南アフリカ共和国の最後通牒を拒否し、南アフリカ共和国とオレンジ自由国はイギリスに宣戦布告した。[34]
歴史的背景

19世紀、アフリカ大陸の南部は、統一された国家を作ろうとする一連の闘争に支配されていた。1868年、イギリスは、ボーア人に対するイギリスの保護を求めたソト族の王モショエショエ1世の要請を受けて、ドラケンスバーグ山脈のバストランドを併合した。1884年から1885年にかけてのベルリン会議は、ヨーロッパ列強のアフリカ領土の境界線を引こうとしたが、同時にさらなる争奪戦の舞台も設定した。イギリスは、1880年にまず南アフリカ共和国を併合しようとし、次いで1899年には南アフリカ共和国とオレンジ自由国の両方を併合しようとした。
1880年代、ベチュアナランド(現在のボツワナ)は、西のドイツ人、東のボーア人、南のイギリスのケープ植民地の間で紛争の対象となった。ベチュアナランドには経済的価値はなかったが、「宣教師の道」がそこを通ってさらに北の領土に向かっていた。1884年にドイツがダマラランドとナマクアランド(現在のナミビア)を併合した後、1885年にイギリスがベチュアナランドを併合した。
1880年から1881年にかけての第一次ボーア戦争では、トランスヴァール共和国のボーア人がイギリスの併合の試みに抵抗する優れた戦士であることを証明し、イギリスに連続した敗北をもたらした。ウィリアム・エワート・グラッドストンのイギリス政府は、当時はわずかな見返りしか得られないと思われていた遠方の戦争に巻き込まれることを望まなかった。休戦協定により戦争は終結し、その後トランスヴァール大統領ポール・クルーガーとの平和条約が締結された。
1884 年 6 月、ボーア人の首都プレトリアから南に約 69 km (43 マイル) の大きな尾根の露頭で、世界最大の金鉱床となる鉱石がヤン ゲリット バンチェスによって発見され、イギリス帝国の関心が高まりました。この尾根は地元では「ウィットウォーターズランド」(白水の尾根、分水嶺) として知られていました。トランスバールへのゴールド ラッシュにより、1806 年以来イギリスの支配下にあったケープ植民地から、世界中から何千人ものイギリス人やその他の探鉱者や入植者が国境を越えてやって来ました。
ヨハネスブルグ市は、ほぼ一夜にしてスラム街として出現した。アイトランダー(外国人、白人の部外者)が流入し、鉱山の周囲に定住した。流入が急速だったため、アイトランダーはヨハネスブルグとランド地方でボーア人より急速に数が増えたが、トランスバールでは少数派のままだった。ボーア人はアイトランダーの存在が増大していることに不安と憤りを感じ、投票権を得る前に長期の居住資格期間を義務付けたり、金産業に課税したり、免許、関税、行政要件による統制を導入したりして、アイトランダーの影響を抑え込もうとした。トランスバール政府とアイトランダーおよび英国の利害関係者との間で緊張を生んだ問題には、次のようなものがあった。
- 鉱山王を含む既存のアイトランダーたちは、自分たちの生活に対する政治的、社会的、経済的支配を望んでいた。これらの権利には、安定した憲法、公正な選挙権法、独立した司法、よりよい教育制度が含まれていた。一方ボーア人は、アイトランダーたちに譲歩すればするほど、約 3 万人のボーア人白人男性有権者と、6 万人のアイトランダー白人男性有権者を抱えるボーア人有権者たちによる、トランスヴァールに対する独自の支配が失われ、領土がイギリス帝国に吸収される可能性が高くなることを認識していた。
- トランスヴァール政府によって課せられた税金に、特にこのお金がヨハネスブルグやアイトランダーの利益のために使われず、トランスヴァールの他のプロジェクトに流用されたことに、アイトランダーは憤慨した。例えば、金鉱石は地下の露頭から南に傾斜しているため、採掘にはますます多くの発破が必要となり、鉱山は大量の爆薬を消費した。5ポンドのダイナマイト1箱には5シリングの税金が含まれていた。この税金は法外だと思われただけでなく、ポール・クルーガー大統領が爆薬製造の独占権をノーベル社の非英国支社に与えたことで英国の利益が損なわれ、英国は激怒した。[37]いわゆる「ダイナマイト独占」は開戦理由となった。
1894年から1895年にかけてクルーガーがポルトガル領東アフリカからデラゴア湾まで鉄道を敷設し、イギリスの関税を回避し、イギリスの管理下にあるナタールとケープタウンの港を迂回する案を提示したとき、イギリス帝国の利益は警戒した。[38]当時、ケープ植民地の首相はセシル・ローズで、ケープからカイロまでイギリスが管理するアフリカという構想に突き動かされていた人物だった。自称植民地人代表やイギリスの鉱山所有者の中には、トランスヴァール政府との取引に不満と怒りを募らせる者もいた。植民地人を代表する改革委員会(トランスヴァール)が結成された。
ジェイムソン襲撃

1895年、ケープ州の首相ローズとヨハネスブルグの金王アルフレッド・ベイトの共謀により、ヨハネスブルグを占領しトランスヴァール政府の支配を終わらせる計画が練られた。セシル・ローズが会長を務める英国南アフリカ会社のローデシア総督ジェイムソンの指揮の下、武装した600人の隊列がベチュアナランドから国境を越えてヨハネスブルグに向かった。主にローデシアとベチュアナランドの英国南アフリカ警察官で構成されていた隊列は、マキシム機関銃といくつかの大砲 を装備していた。
計画は、ボーア軍特殊部隊が動員される前に、ヨハネスブルグまで3日間かけて急行し、ヨハネスブルグ改革委員会が組織した、主にイギリス人国外居住者であるニュージャージー州民による蜂起を引き起こすことだった。しかし、トランスヴァール当局はジェイムソン襲撃を事前に警告されており、国境を越えた瞬間から追跡していた。4日後、疲れ果て意気消沈した部隊は、ヨハネスブルグが見えるクルーガーズドルプ付近で包囲された。短い小競り合いで部隊は65人が死傷し、ボーア人は1人を失っただけだったが、ジェイムソンの部隊は降伏し、ボーア人に逮捕された。[21] : 1–5
この失敗した襲撃は南アフリカ全土とヨーロッパに波紋を呼んだ。ローデシアでは、多くの警官が撤退したことにより、マタベレ族とマショナ族がイギリス南アフリカ会社に対して蜂起する事態を招いた。第二次マタベレ戦争として知られるこの反乱は、多大な犠牲を払って鎮圧された。
襲撃の数日後、ドイツ皇帝は、歴史上「クルーガー電報」として知られる電報を送った。クルーガー大統領と南アフリカ共和国政府の成功を祝福する内容だった。この電報の文面がイギリスの新聞で公開されると、反ドイツ感情の嵐が巻き起こった。襲撃隊の荷物の中に、イギリスにとって非常に恥ずかしいことに、ボーア人はヨハネスブルグのセシル・ローズと他の陰謀家たちからの電報を見つけた。チェンバレンは、ヨハネスブルグの蜂起の際に武装援助を送るというローズの計画を承認していたが、すぐに襲撃を非難する方向に動いた。ローズはケープ調査とロンドン議会調査で厳しく非難され、失敗したクーデターを支援したとしてケープ首相とイギリス南アフリカ会社の会長を辞任せざるを得なくなった。
ボーア政府は捕虜をイギリスに引き渡して裁判にかけた。ジェイムソンはイギリスで裁判にかけられ、反ボーア、反ドイツの感情と狂乱の愛国主義に燃えるイギリスのマスコミとロンドン社会はジェイムソンを称賛し英雄として扱った。ジェイムソンは15ヶ月の懲役刑を宣告されたが(ホロウェイ刑務所で服役)、後にケープ植民地の首相(1904年~1908年)に任命されるという報いを受け、最終的には南アフリカ連邦の創設者の一人に選ばれた。ジェイムソンと共謀したとして、改革委員会(トランスバール)のアイトランダー党員はトランスバールの裁判所で裁判にかけられ、大逆罪で有罪となった。4人の指導者は絞首刑による死刑を宣告されたが、翌日この判決は懲役15年に減刑された。 1896 年 6 月、委員会の他のメンバーはそれぞれ 2,000 ポンドの罰金を支払って釈放されたが、その全額をセシル・ローズが支払った。改革委員会メンバーの 1 人であるフレデリック・グレイは、5 月 16 日にプレトリア刑務所で自殺した。彼の死は、生き残った囚人に対するトランスヴァール政府の態度を和らげる要因となった。
ジャン・C・スマッツは1906年に次のように書いています。
ジェイムソン襲撃は、本当の戦争宣言だった...そしてそれは、その後の4年間の休戦にもかかわらず... [侵略者は]同盟を強化した...一方、防衛者は沈黙して厳粛に避けられない事態に備えていた」[21] :9
エスカレーション
ジェイムソン襲撃は、多くのケープ・アフリカーナーを英国から遠ざけ、トランスヴァールのボーア人をクルーガー大統領とその政府の下に結束させた。また、トランスヴァールとオレンジ自由国(大統領マルティヌス・テウニス・ステイン率いる)を英国帝国主義に対抗する立場に結集させる効果もあった。1897年、両共和国は軍事協定を締結した。
ボーア人の武装

初期の紛争では、ボーア人が最もよく使っていた武器はイギリスのウェストリー・リチャーズ式後装式銃だった。ジョセフ・レーマンは著書『第一次ボーア戦争』の中で、「口径45、紙薬莢、雷管は手動でニップルに交換する、非常に優れた後装式ウェストリー・リチャーズ銃を主に使用していたため、イギリス軍が地上で身をさらすことは非常に危険だった」と述べている。[39]
.jpg/500px-Rifle,_bolt_action_(AM_1930.61-17).jpg)
クルーガーはトランスヴァール軍の装備を再調整し、ドイツから最新の7x57 mmモーゼルモデル1895ライフル37,000丁を輸入した[40]。また、弾薬も4000万発から5000万発を輸入した[41]。[ 22] : 80 一部のコマンドーはマルティーニ・ヘンリー・マークIIIを使用したが、これは数千丁購入されていたためである。残念ながら、発砲後に大量の白煙が立ち上るため、射手の位置がバレてしまった[42] 。 [43]数年前にはゲデス1885ライフルも約7,000丁購入されており、これも戦闘中に使用された[42] 。
戦争が進むにつれて、一部のコマンドーはリー・メトフォードやエンフィールドなどのイギリス軍のライフルに頼るようになった。[40] [26]実際、モーゼル銃の弾薬が尽きると、ボーア人は主に捕獲したリー・メトフォードに頼った。[44] [45]
ライフル銃にかかわらず、銃剣を使用したボーア人はほとんどいなかった。[46] [33]
ボーア人はまた、ヨーロッパで最も優れた近代的なドイツのクルップ砲を購入した。1899年10月までに、トランスヴァール州砲兵隊は、4門の155 mmクルーゾー要塞砲[47]と25門の37 mmマキシムノルデンフェルト砲[22]を含む73 門の重砲を保有していた。 ボーア人のマキシムは、イギリスのマキシムよりも大きく、[48]大口径でベルト給弾式、水冷式の「自動砲」で、毎分450発の炸薬弾(無煙弾)を発射した。この砲は「ポンポン」として知られるようになった。[49]
武器以外にも、ボーア人が使用した戦術は重要であった。ある現代の資料には、「ボーア人の兵士はゲリラ戦に長けており、イギリス軍が対抗するのに苦労していた」と記されている。[50]
トランスヴァール軍は変貌を遂げ、近代的なライフルと大砲を装備した約 25,000 人の兵士が 2 週間以内に動員されるようになった。しかし、ジェイムソン襲撃事件におけるクルーガー大統領の勝利は、トランスヴァールの独立を放棄することなく、アイトランダーズを和解させる方法を見つけるという根本的な問題を解決することにはつながらなかった。
イギリスの戦争論拠

ケープ植民地の住民の権利向上(特に金鉱のダイナマイト税)を得られなかったことが戦争の口実となり、ケープ植民地での大規模な軍備増強を正当化した。戦争の論拠は遠くオーストラリア植民地にまで展開され、支持された。[51]ケープ植民地総督のサー・アルフレッド・ミルナー、ローズ、チェンバレン、そしてベイト、バーニー・バーナート、ライオネル・フィリップスなどの鉱山シンジケートの所有者は、ボーア人共和国の併合を支持した。ボーア人はすぐに敗北すると確信していた彼らは、短期戦争を計画し、組織し、紛争の動機としてケープ植民地の住民の不満を挙げた。対照的に、英国政府内での戦争派の影響力は限られていた。英国首相のソールズベリー卿は、愛国主義と愛国主義者を嫌悪していた。[52]彼はまた、英国軍の能力についても確信が持てなかった。ソールズベリーは道徳的および実際的な懸念を抱いていたが、大英帝国の威信を保つため、また英国領南アフリカ人に対する義務感から、イギリスを戦争に導いた。[e]ソールズベリーはまた、ボーア人による原住民アフリカ人の扱いを嫌悪し、1884年のロンドン会議(第一次大戦でのイギリスの敗北後)を「実際には奴隷制に有利な」協定と呼んだ。[53] : 7 [53] : 6 ソールズベリーだけがこのような懸念を抱いていたわけではない。アイルランド民族主義者になる道を既に歩み始めていたロジャー・ケースメントは、それでもなお、アフリカ人に対するボーア人の残酷さゆえに、イギリスのためにボーア人に対する情報収集を喜んで行っていた。[54]

英国政府は将軍たち(ウォルズリーを含む)の助言に反し、戦争勃発前に南アフリカに大規模な援軍を送ることを拒否した。陸軍大臣ランズダウンはボーア人が戦争の準備をしていないと信じており、英国がこの地域に大量の軍隊を派遣すれば、攻撃的な姿勢になりすぎて交渉による解決が頓挫する可能性があり、さらにはボーア人の攻撃を助長することになるだろうと考えた。[55]
交渉は失敗
オレンジ自由国のステインは、ミルナーとクルーガーをブルームフォンテーンの会議に招待した。会議は1899年5月30日に始まったが、クルーガーは意味のある譲歩をする意思がなく、 [56] : 91 ミルナーも彼のいつもの遅延戦術を受け入れる意思がなかったため、交渉はすぐに決裂した。 [57]
クルーガーの最後通牒と戦争
1899年10月9日、クルーガーはオレンジ自由国を説得して味方につけ、軍隊を動員した後、イギリスに48時間以内にトランスヴァール国境から全軍を撤退させる最後通牒を出した(両共和国の国境付近にいたイギリス正規軍は、キンバリー防衛に派遣されていたロイヤル・ノース・ランカシャー連隊の4個 中隊だけだったにもかかわらず)。撤退しなければ、オレンジ自由国と同盟を組んだトランスヴァールが宣戦布告することになった。 [58]
最後通牒のニュースは、期限切れの日にロンドンに届いた。怒りと笑いが主な反応だった。タイムズ紙の編集者は、それを読んだとき「公式文書が面白くて役に立つことはめったにないが、これはその両方だ」と大声で笑ったと伝えられている。タイムズ紙は最後通牒を「大げさな茶番」と非難し、グローブ紙はこの「つまらない小さな国家」を非難した。ほとんどの社説はデイリー・テレグラフ紙の社説に似ており、「もちろん、このグロテスクな挑戦に対する答えは1つしかない。クルーガーは戦争を求めており、戦争をしなければならなかったのだ!」と宣言した[要出典]
このような見解は、英国政府や軍関係者の見解とはかけ離れている。賢明な観察者の多くにとって、軍改革は1870年代以来の差し迫った懸念事項であったが、英国国民はより大規模でより専門的な軍隊の費用を望まず、また大規模な国内軍は政治的に歓迎されなかったため、常に先送りされてきた。首相のソールズベリー卿は、驚いたヴィクトリア女王に「二流の大陸諸国にさえ対抗できる軍隊はない」と言わざるを得なかった。[53] : 4
第一段階: ボーア人の攻勢 (1899 年 10 月 - 12 月)
イギリス軍が派遣された
1899年9月にボーア共和国との戦争が差し迫ると、陸軍軍団(第1軍団と呼ばれることもある)と呼ばれる野戦部隊が動員され、ケープタウンに派遣された。これは「既存の動員計画の第1軍団とほぼ同等」であり、アルダーショット司令部の最高司令官であるサー・レドヴァース・ブラー将軍の指揮下に入った。[59]南アフリカでは軍団がそのように活動することはなく、第1、第2、第3師団は広範囲に分散していた。
ボーア人の組織とスキル
1899年10月11日、イギリスが支配するナタールとケープ植民地地域へのボーア人の攻勢により戦争が宣言された。ボーア人の兵士は約33,000人で、イギリス軍を圧倒的に上回っていた。イギリス軍が前線に動員できたのはわずか13,000人だった。[60]独立心の強いボーア人には、両共和国の国立砲兵隊(オランダ語で「国立砲兵隊」の意味)以外には正規軍がなかったため、動員には問題はなかった。第一次ボーア戦争と同様に、ボーア人の大半は民間民兵であったため、制服や記章を採用した者はいなかった。国立砲兵隊のメンバーだけが薄緑色の制服を着用していた。

危険が迫ると、地区内のすべての市民がコマンドと呼ばれる部隊を編成し、将校を選出した。専任の役人がフェルドコルネットと呼ばれ、召集名簿を管理したが、懲戒権はなかった。各自が自分の武器(通常は狩猟用ライフル)と自分の馬を持参した。銃を購入する余裕のない者には、当局から銃が与えられた。[22] : 80 トランスヴァールとオレンジ自由国の大統領は、1週間以内に集結するよう法令に署名するだけで、コマンドは3万人から4万人の兵士を召集することができた。[21] : 56 それでも、平均的なボーア人は戦争を渇望していなかった。多くは、仲間のキリスト教徒、そして概して仲間のプロテスタントと戦うことを心待ちにしていなかった。多くの人は、この戦争が何を伴うかについて過度に楽観的な認識を持っていたかもしれない。第一次ボーア戦争のときのように、勝利はすぐに簡単に達成できると想像していたのだ。 [ 22] : 74 また、多くの将軍を含む多くの人々は、自分たちの大義は神聖で正義であり、神に祝福されているという認識を持っていた。[22] : 179
ボーア軍がイギリス軍にとって厳しい戦術的挑戦であることがすぐに明らかになった。ボーア軍が示したのは、第一次ボーア戦争の経験を生かした機動性と革新的な戦闘アプローチだった。彼らの特殊部隊を構成していた平均的なボーア人は、農民であり、農夫としても狩猟者としても、ほぼ全労働生活を送ってきた農民だった。彼らは鍋、馬、ライフル銃に依存していたが、熟練した追跡者や射撃手でもあった。狩猟者として、彼らは遮蔽物から撃つこと、伏せた姿勢から撃つこと、そして最初の一発を命中させることを学んでいた。もしミスをすれば、獲物はとっくにいなくなっているか、突撃して自分たちを殺してしまう可能性があることを知っていたからだ。
地域の集まりでは、標的射撃が主要なスポーツだった。彼らは、100メートル (110ヤード) 離れた柱にとまった鶏の卵などの標的を撃つ練習をした。彼らは熟練した騎馬歩兵を作り上げ、あらゆる掩蔽物を利用して、最新の無煙モーゼル銃で破壊的な射撃を浴びせた。戦闘に備えて、ボーア人は最新のクルップ 野砲約100挺を入手した。これらはすべて馬に引かれ、さまざまなコマンドーグループに分散されていた。また、ル・クルーゾの「ロング・トム」攻城砲もいくつかあった。ボーア人が一流の砲兵になるために適応するスキルは、彼らが多才な敵であったことを示している。[21] : 30 トランスヴァールには南アフリカ全土に広がる諜報機関もあったが、その範囲と効率性についてはイギリスはまだ知らなかった。[22] : 81
ボーア人がレディスミス、マフェキング、キンバリーを包囲

ボーア人は10月12日のクライパンの戦いで最初に攻撃を仕掛け、この攻撃は1899年10月から1900年1月にかけてのケープ植民地とナタールへの侵攻の先駆けとなった。 [58] : 20 ボーア人は素早く奇襲を仕掛け、レディスミスのイギリス軍守備隊とマフェキングとキンバリーの小規模な守備隊に向かって進軍した。ボーア人の素早い動員により、散り散りになっていたイギリス軍に対して早い段階で軍事的勝利を収めた。レディスミスのイギリス軍師団を指揮していたジョージ・スチュアート・ホワイト卿は、愚かにもペン・シモンズ少将が丘陵に囲まれた炭鉱の町ダンディー(グレンコーとも呼ばれた)に旅団を前進させるのを許可した。ここが戦争最初の大衝突、タラナ・ヒルの戦いの現場となった。10月20日の夜明け、ボーア軍の砲がタラナ・ヒルの頂上からイギリス軍の陣地を砲撃し始めた。ペン・サイモンズは即座に反撃し、彼の歩兵部隊はボーア人を丘から追い出し、ペン・サイモンズを含む446人のイギリス軍の死傷者を出した。
別のボーア軍がレディスミスとダンディーの間にあるエランドスラグテを占領した。ジョン・フレンチ少将とイアン・ハミルトン大佐率いるイギリス軍は、ダンディーへの連絡線を遮断するために攻撃を仕掛けた。結果として生じたエランドスラグテの戦いは、イギリス軍の明らかな戦術的勝利であったが、[58] : 29 ジョージ・ホワイト卿は、さらに多くのボーア人が主力陣地を攻撃しようとしていることを恐れ、エランドスラグテからの混乱した撤退を命じ、獲得した優位性をすべて放棄した。ダンディーからの分遣隊は、ホワイトの主力部隊に合流するために、疲労困憊する撤退を強いられた。ボーア人がレディスミスを包囲し、攻城砲で町に発砲すると、ホワイトは彼らの陣地への大規模な出撃を命じた。[58] : 33 結果は惨事となり、140人が死亡、1,000人以上が捕虜となった。レディスミスの包囲が始まった。それは数か月続いた。
一方、北西のトランスヴァールとの国境にあるマフェキングでは、ロバート・ベーデン=パウエル大佐が、南で事態が悪化した場合に攻撃して陽動作戦を起こせるよう、約1,200人の地元軍2個連隊を編成していた。鉄道の結節点であるマフェキングは補給施設が充実しており、ベーデン=パウエルが攻撃に備えて要塞化するには当然の場所だった。しかし、ベーデン=パウエルは侵略者となるどころか、ピエト・クロニエ率いる6,000人のボーア人が町に決然とした攻撃を仕掛けようとしたため、マフェキングを防衛せざるを得なかった。これはすぐに散発的な戦いとなり、ボーア人は要塞を飢えさせて屈服させる覚悟をしていた。こうして10月13日、217日間にわたるマフェキング包囲戦が始まった。
最後に、マフェキングの南360キロ (220 マイル) 以上離れたダイヤモンド採掘都市キンバリーも包囲された。軍事的には重要ではなかったが、オレンジ自由国との国境にあるイギリス帝国の飛び地であり、ボーア人にとって重要な目標であった。11月初旬、約7,500人のボーア人が包囲を開始し、再び飢えさせて町を屈服させることに成功した。ボーア人の砲撃にもかかわらず、町には食料が十分に備蓄されていたため、4万人の住民のうち武装していたのはわずか5,000人で、ほとんど脅威にならなかった。守備隊の指揮官はロバート・ケケウィッチ中佐であったが、ローズも町の防衛で重要な役割を果たしていた。
包囲生活は、数週間後には食糧が不足し始め、マフェキング、レディスミス、キンバリーの各都市の防衛軍と民間人の両方に打撃を与えた。ソル・プラアチェはマフェキングで「私は馬肉が人間の食料として扱われるのを初めて見た」と書いている。包囲された都市は絶え間ない砲撃にも対処し、通りは危険な場所となった。キンバリー包囲の終わり近くには、ボーア人が砲撃を強めると予想されたため、ローズは人々に身を守るためにキンバリー鉱山の坑道に降りるよう促す通告を掲示した。町民はパニックに陥り、12時間にわたって絶えず坑道に押し寄せた。砲撃は行われなかったが、不安な民間人の苦悩を和らげることはできなかった。セシル・ローズを含む最も裕福な町民たちは、現在のマクレガー博物館があるサナトリウムに避難したが、貧しい住民、特に黒人住民は砲撃から身を守る場所がなかった。
振り返ってみると、ボーア人が包囲戦(シッツクリーグ)に身を投じる決断は誤りであり、戦略的ビジョンの欠如を最もよく示す例の 1 つであった[誰によると? ] [要出典]。歴史的に見て、この戦いはボーア人に有利なことはほとんどなかった。第一次ボーア戦争の 7 回の包囲戦のうち、ボーア人が勝利したのは 1 回もなかった。さらに重要なのは、この戦いによって主導権が英国に戻り、英国が回復する時間ができたことであり、英国は回復した。一般的に言って、この戦いを通じてボーア人は防御的かつ消極的になりすぎて、勝利のチャンスを無駄にしていた。しかし、この消極的な態度は、彼らが英国領土を征服する願望はなく、自国領土を統治する能力を維持することだけを望んでいたという事実をも証明している。[22] : 82–85
イギリスの最初の救援活動
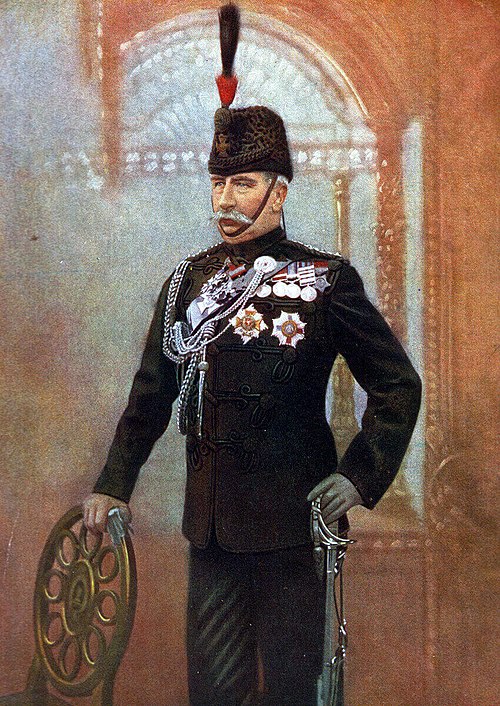
1899年10月31日、非常に尊敬されていた指揮官であるサー・レドヴァース・ヘンリー・ブラー将軍が、第1、第2、第3師団からなる軍団を率いて南アフリカに到着した。ブラー将軍は当初、ケープタウンからブルームフォンテーンを経由してプレトリアに至る鉄道線路に沿って直進して攻勢をかけるつもりだった。到着後、南アフリカに既に駐留していたイギリス軍が包囲されているのを知ると、彼は軍団を分遣隊に分け、包囲された守備隊を救援した。メシューエン中将率いる1つの師団は、ウェスタン鉄道に沿って北上し、キンバリーおよびマフェキングを救援することになっていた。ウィリアム・ガタカー少将率いる約3,000人の小規模な部隊は、ストームバーグの鉄道ジャンクションに向けて北進し、ケープ・ミッドランズ地区をボーア人の襲撃およびボーア人住民による地元の反乱から守ることになっていた。ブラー将軍は軍団の大半を率いて東のレディスミスを救援した。
この攻勢の初期の結果はまちまちで、メシュエンは11月23日のベルモントの戦い、 11月25日のグラスパンの戦い、そして11月28日のより大規模な戦闘であるモッダー川の戦いで、いくつかの血なまぐさい小競り合いに勝利したが、イギリス軍の損害は71名が死亡、400名以上が負傷した。イギリス軍の指揮官たちはクリミア戦争の教訓に基づいて訓練を受けており、ジャングル、砂漠、山岳地帯での縦隊の機動など、大隊や連隊の定位置での戦闘には熟達していた。イギリス軍の将軍たちが理解できなかったのは、塹壕陣地からの破壊的な射撃と騎兵襲撃の機動力の影響だった。イギリス軍は、機動力のあるボーア軍に対し、近代的なモーゼル銃、最新のクルップ野砲、そして斬新な戦術による破壊的な射撃で、後に時代遅れの戦術、場合によっては時代遅れの武器で戦いに臨んだ。[61]
12月中旬はイギリス軍にとって悲惨な時期だった。暗黒週間(1899年12月10日~15日)として知られる期間に、イギリス軍は3つの戦線すべてで敗北を喫した。12月10日、ガタカー将軍はオレンジ川の南約80キロ(50マイル)にあるストームベルク鉄道ジャンクションの奪還を試みた。ガタカーの攻撃は管理上および戦術上の失策が目立ち、ストームベルクの戦いはイギリス軍の敗北に終わり、135人が死傷し、大砲2門と600人以上の兵士が捕虜となった。
12月11日のマガーズフォンテンの戦いで、メシュエンの14,000人のイギリス軍は、キンバリーの救援のため、夜明けの攻撃でボーア軍の陣地を奪取しようとした。これもまた、ハイランド旅団がボーア軍の正確な射撃に釘付けになり、惨事となった。9時間も猛暑と渇きに苦しんだ後、彼らはついに規律のない撤退で敗走した。ボーア軍の指揮官、クース・デ・ラ・レイとクロニエは、イギリス軍を欺き、ライフル兵の射程距離を広げるために、通常とは異なる場所に塹壕を掘るよう命じていた。この計画は成功し、この戦術は、近代的な小火器と塹壕要塞を用いた防御陣地の優位性の教義を形作るのに貢献した。 [62] [出典が必要]イギリス軍は120人が死亡、690人が負傷し、キンバリーとマフェキングの救援を阻止された。イギリス軍兵士は敗北について次のように語っている。

我が連隊にとって、このような日だった
。復讐を恐れるしかない。失策
の代償は高くついた。
応接室の将軍の失策だ。
なぜ塹壕のことは知らされなかったのか
。なぜ鉄条網のことは知らされなかったのか。
なぜ縦隊で行進させられたのか。トミー・アトキンスが
尋ねてくれることを願う...— スミス二等兵[f]
暗黒週間のどん底は12月15日のコレンソの戦いであった。ブラー指揮下の2万1千人のイギリス軍がトゥゲラ川を渡ってレディスミスを救出しようとしたが、そこではルイス・ボタ指揮下の8千人のトランスヴァール・ボーア人が彼らを待ち受けていた。砲撃と正確なライフル射撃の組み合わせと地表の有効活用により、ボーア人はイギリス軍の渡河の試みをすべて撃退した。ブラーは最初の攻撃が失敗した後、戦闘を中断して撤退を命じ、多くの負傷者、孤立した部隊数個、野砲10門をボタの部隊に捕獲させた。ブラーの部隊は145人が死亡、1,200人が行方不明または負傷し、ボーア人の損害はわずか40人で、うち8人が死亡であった。[53] : 12
第二段階: 1900年1月から9月までのイギリス軍の攻勢

イギリス政府はこの敗北を痛感し、包囲戦がまだ続いているため、さらに2個師団と多数の植民地義勇兵を派遣せざるを得なかった。1900年1月までに、これはイギリスが海外に派遣した最大の軍隊となり、約18万人に達し、さらなる増援が求められた。[11]
これらの増援を待ちながら、ブラーはコレンソの西でトゥゲラ川を渡ってレディスミスを救出しようと再度試みた。ブラーの部下であるチャールズ・ウォーレン少将は川を渡ることに成功したが、次にスピオン・コップとして知られる目立つ丘を中心とした新たな防御陣地に直面した。結果として起こったスピオン・コップの戦いで、イギリス軍は1900年1月24日の未明に不意を突いて山頂を占領したが、早朝の霧が晴れると、周囲の丘にあるボーア人の砲台に見落とされていたことに気付いた時には遅すぎた。その日の残りの時間は、ブラーと指揮官の間のコミュニケーション不足が原因で惨事となった。彼らの間では矛盾した命令が発せられ、一方では丘から退却するよう命じたが、他の士官は丘を守るために新たな増援を命じた。その結果、350人が死亡、約1,000人が負傷し、トゥゲラ川を渡ってイギリス領に撤退した。約300人のボーア人の死傷者が出た。
ブラーは2月5日、ヴァール・クランツで再びルイス・ボタを攻撃したが、またもや敗北した。ブラーはイギリス軍がトゥゲラ川を渡った無防備な橋頭堡で孤立すると思われると早々に撤退したため、部下の士官たちから「サー・リバース」というあだ名を付けられた。
ブラーが交代

ブラーは自らナタールで指揮を執ったことで、戦争の全体的な方向性を迷わせてしまった。ブラーの働きと現場からの否定的な報告に対する懸念から、最高司令官の座はロバーツに交代した。ロバーツはすぐに司令部スタッフとして全く新しいチームを編成し、スーダンからキッチナー(参謀長)、クロンダイクからはアメリカ人斥候のフレデリック・ラッセル・バーナム(偵察隊長)、参謀学校からはジョージ・ヘンダーソン、アフガニスタンからはネヴィル・ボウルズ・チェンバレン、カルカッタからはウィリアム・ニコルソン(軍事長官)と、遠方から軍人を選んだ。 [要出典]ブラーと同様、ロバーツも当初はケープタウン・プレトリア鉄道に沿って直接攻撃するつもりだったが、ブラーと同様、包囲された守備隊を救出せざるを得なかった。ロバーツはブラーにナタールの指揮を任せ、主力部隊をオレンジ川の近くとウェスタン鉄道に沿って集結させ、モッダー川にいるメシュエンの部隊の背後に置き、キンバリーを救出するために広範囲に渡る側面攻撃を行う準備を整えた。
ナタール以外では、戦争は停滞していた。レディスミスを襲撃しようとした一回の試み以外、ボーア人は包囲された町を占領しようとはしなかった。ケープミッドランドでは、ボーア人はストームベルクでのイギリス軍の敗北を利用せず、コールズバーグの鉄道ジャンクションの占領を阻止された。乾燥した夏には、草原の牧草地は干上がり、ボーア人の馬や荷役牛は弱り、多くのボーア人の家族が包囲線やラガー(野営地)に男たちと一緒に入り、クロニエ軍に致命的な障害を負わせた。
ロバーツが包囲を解く
ロバーツは1900年2月10日に主攻撃を開始し、長い補給路に阻まれながらも、マガーズフォンテインを守るボーア軍の側面を突破することに成功した。2月14日、フレンチの指揮する騎兵師団がキンバリー救援のため大規模な攻撃を開始した。激しい砲火に遭遇したものの、2月15日には騎兵の集中突撃によりボーア軍の防衛線が分断され、その日の夕方にフレンチがキンバリーに侵入する道が開かれ、124日間に及ぶ包囲が終わった。
一方、ロバーツはピエト・クロニエの7,000人の部隊を追撃した。この部隊はマガーズフォンテインを放棄してブルームフォンテインに向かっていた。フレンチ将軍の騎兵隊は追撃を支援するよう命じられ、クロニエがモッダー川を渡ろうとしていたパーデベルグに向けて50km (31マイル) の壮大な進撃に乗り出した。 2月18日から27日までのパーデベルグの戦いで、ロバーツは撤退するクロニエのボーア軍を包囲した。2月17日、フレンチの騎兵隊とイギリス軍主力の双方が塹壕を攻略しようと挟撃作戦を仕掛けたが、正面攻撃が協調されておらずボーア軍に撃退された。最終的にロバーツはクロニエを降伏させるために砲撃に頼った。これには10日かかり、イギリス軍が汚染されたモッダー川を水源として使った際にチフスで多くの兵士が死亡した。クロニエ将軍は4,000人の兵士とともにサレンダー・ヒルで降伏を余儀なくされた。

ナタールでは、 2月14日に始まったトゥゲラ高地の戦いが、ブラーがレディスミスを救出するための4度目の試みだった。ブラーの部隊が被った損失により、ブラーはボーア人の戦術を採用することを決意した。「前線では、小隊を率いて前進し、背後からライフル銃の援護を受ける。砲兵の戦術的支援を受ける。そして何よりも、岩や土を敵と同じように自分たちにも利用すること」。援軍があったにもかかわらず、ブラーの進撃は頑強な抵抗に非常に遅かった。しかし、2月26日、熟考の末、ブラーは初めて全軍を総攻撃に投入し、ついにトゥゲラ川を越えさせ、コレンソ北部のボタ軍を破ることに成功した。 118日間続いた包囲戦の後、クロニエが降伏した翌日にレディスミスの救援が行われたが、イギリス軍の死傷者は合計7,000人に達した。ブラーの軍隊は2月28日にレディスミスに進軍した。 [63]
敗北が続いた後、ボーア人は圧倒的な数の軍隊を前にしてイギリス軍を倒す見込みはほとんどないと悟り、士気が低下した。その後、ロバーツは西からオレンジ自由国に進軍し、ポプラ・グローブの戦いでボーア人を敗走させ、3月13日には首都ブルームフォンテーンを無抵抗で占領したが、ボーア人の守備隊は逃げて散り散りになった。その間、ロバーツはベーデン=パウエルを救出するために小部隊を派遣した。 1900年5月18日のマフェキング救出はイギリスで大騒ぎを引き起こし、これがエドワード朝の俗語「マフィッキング」の語源となった。5月28日、オレンジ自由国は併合され、オレンジ川植民地と改名された。
プレトリアの占領
補給品の不足、パールデバーグでの腸チフスの流行、医療の不備によりブルームフォンテーンで数週間の遅延を余儀なくされた後、ロバーツはようやく前進を再開した。[64]彼は医療および補給システムの崩壊により再びクローンスタッドで10日間の停止を余儀なくされたが、5月31日にヨハネスブルグを、6月5日にトランスヴァールの首都プレトリアを占領した。プレトリアに最初に入城したのはニューサウスウェールズ騎馬ライフル隊のウィリアム・ワトソン中尉で、ボーア人に首都の明け渡しを説得した。[65]戦争前、ボーア人はプレトリア南部にいくつかの砦を建設していたが、野戦で使用するために砦から大砲が撤去されており、万一の場合に備えてボーア人は戦うことなくプレトリアを放棄した。主要都市を制圧したロバーツは、1900年9月3日に戦争終結を宣言した。南アフリカ共和国が正式に併合された。

イギリスの観測者は、2つの首都の占領後、戦争はほぼ終わったと考えていた。しかし、ボーア人はそれ以前にオレンジ自由国の臨時新首都であるクローンスタッドで会合し、イギリス軍の補給線と通信線を攻撃するゲリラ作戦を計画していた。この新しい形態の戦争の最初の戦闘は3月31日のサンナ砦で行われ、クリスティアーン・デ・ウェットの指揮下にある1,500人のボーア人がブルームフォンテーンの東約37キロにある水道施設を攻撃し、厳重に護衛された車列を待ち伏せした。この攻撃でイギリス軍は155人の死傷者を出し、大砲7門、荷馬車117台、イギリス軍兵士428人が捕獲された。[66]
プレトリア陥落後、最後の正式な戦闘の一つは6月11日から12日にかけてのダイアモンドヒルで、ロバーツはボタ率いるボーア野戦軍の残党をプレトリアの攻撃範囲外まで追い払おうとした。ロバーツは丘からボーア人を追い払ったが、ボタはそれを敗北とは考えなかった。ロバーツはイギリス軍に162人の死傷者を負わせたが、ボタの死傷者はわずか50人程度だったからである。
ボーア人の撤退
戦争の定型的な時期は、今や主に機動的なゲリラ戦に取って代わられたが、最後の作戦が残っていた。クルーガー大統領とトランスヴァール政府の残党は、トランスヴァール東部に撤退した。ロバーツは、ブラー指揮下のナタールの部隊と合流して彼らに向かって進軍し、 8月26日にベルゲンダルで彼らの最後の防衛陣地を突破した。ロバーツとブラーが鉄道に沿ってコマティポールトまで追撃する間、クルーガーはポルトガル領東アフリカ(現在のモザンビーク)に亡命を求めた。意気消沈したボーア人の一部も同様に亡命し、イギリス軍は多くの軍需物資を集めた。しかし、ボタ指揮下のボーア人戦闘員の中核部隊は、ブッシュフェルトを北上した後、ドラケンスバーグ山脈を突破してトランスヴァール高原地帯に容易に帰還した。
ロバーツ軍がプレトリアを占領すると、オレンジ自由国のボーア人戦士たちは共和国南東部の肥沃な地域であるブランドウォーター盆地に撤退した。ここは一時的な避難所に過ぎなかった。そこへ続く山道はイギリス軍に占領され、ボーア人が閉じ込められる恐れがあったからである。アーチボルド・ハンター将軍率いる部隊は、1900年7月にブルームフォンテーンから出発してこれを達成した。デ・ウェット指揮下の自由国ボーア人中核勢力はステイン大統領に同行され、早めに盆地を離れた。残っていた者たちは混乱に陥り、ほとんどがハンターに閉じ込められる前に脱出できなかった。4,500人のボーア人が降伏し、多くの装備が捕獲されたが、同時期にロバーツがクルーガーに対して行った攻撃と同様に、ボーア軍の中核勢力と最も決意の固く活動的な指導者たちが逃亡中であったため、これらの損失は比較的軽微であった。
ベイスンから、クリスティアーン・デ・ヴェットは西に向かった。イギリス軍の部隊に追い回されたが、彼はヴァール川を渡ってトランスヴァール西部に入り、ステインが彼らの指導者に会うために旅をすることができた。ヨーロッパ大陸ではボーア人に対する同情が大きかった。10月、クルーガー大統領とトランスヴァール政府のメンバーは、ネーデルラント女王ウィルヘルミナが派遣したオランダの軍艦デ・ヘルダーラント号に乗ってポルトガル領東アフリカを出発した。しかし、ポール・クルーガーの妻は病気で渡航できず、南アフリカに留まり、夫に再会することなく1901年7月20日に亡くなった。クルーガー大統領はまずマルセイユに行き、次にオランダに渡り、そこでしばらく過ごした後、最終的にスイスのクラレンスに移り、1904年7月14日に亡命先で亡くなった。
海外に送られた捕虜

イギリス軍が最初に捕らえたボーア人捕虜の大量集団は、 1899年10月21日のエランドスラグテの戦いで捕らえられた者たちであった。当初、これらの捕虜は、ケープタウンとシモンズタウンの捕虜収容所が完成するまで、シモンズ湾の軍艦に収容された。戦争中、南アフリカには合計6つの捕虜収容所が設置された。[67]捕虜の数が増えるにつれ、イギリス軍は捕虜を現地に留めておくことを望まないと決定した。1900年2月に4000人の捕虜が捕らえられたことは重要な出来事であり、これによってイギリス軍は南アフリカ国内で全ての捕虜を収容することはできないと悟った。[68]イギリス軍は捕虜が同情的な地元民によって解放されるのではないかと恐れた。さらに、イギリス軍は南アフリカ国内で既に自軍の補給に問題を抱えており、捕虜に物資を送るという負担を増やしたくなかった。そのためイギリス軍は多くの捕虜を海外に送ることを選択した。
その結果、戦争中、海外のイギリス植民地に約31の捕虜収容所が設立されました。[67]最初の海外(アフリカ本土外)収容所はセントヘレナ島に開設され、最終的に約5,000人の捕虜が収容されました。[69]約5,000人の捕虜がセイロン島に送られました。[70]その他の捕虜はバミューダ諸島とインドに送られました。[68]
合計で約26,000人の捕虜が海外に送られた。[71]
中立の誓い
1900年3月15日、ロバーツ卿は指導者を除くすべての市民に恩赦を宣言し、指導者は中立の誓いを立てて静かに自宅に戻った。[72] 1900年3月から6月の間に12,000人から14,000人の市民がこの誓いを立てたと推定されている。[73]
第三段階: ゲリラ戦争 (1900 年 9 月 - 1902 年 5 月)

1900 年 9 月までに、英国軍はトランスヴァール北部を除き、名目上は両共和国を支配していた。しかし、英国軍はすぐに、自分たちの部隊が物理的に占領している地域しか支配していないことに気付いた。2 つの首都と軍の半分を失ったにもかかわらず、ボーア軍の指揮官たちはゲリラ戦法を採用し、主に鉄道、資源、補給目標を襲撃し、英国軍の作戦能力を混乱させることを狙った。彼らは激戦を避け、死傷者は少なかった。
各ボーア人コマンド部隊は、メンバーが募集された地区に派遣されたため、地元の支援や、地区内の地形や町に関する個人的な知識に頼ることができ、土地で暮らすことができた。彼らの命令は、可能な限りイギリス軍に対抗することだけだった。彼らの戦術は、迅速かつ激しく攻撃して敵に可能な限りの損害を与え、敵の増援が到着する前に撤退して姿を消すことだった。共和国間の距離が広大だったため、ボーア人コマンド部隊はかなり自由に移動することができ、25万人のイギリス軍が縦隊だけで効果的に領土を制圧することはほぼ不可能だった。イギリス軍の縦隊が町や地区を離れるとすぐに、その地域のイギリス軍の支配は薄れてしまった。ボーア人コマンド部隊は、戦争の初期のゲリラ段階で特に効果的だった。なぜなら、ロバーツは、戦争はボーア人の首都の占領とボーア軍の主力の解散で終わると想定していたからである。そのため、多くのイギリス軍がこの地域から再配置され、帝国ヨーマンリーと地元で編成された非正規軍団の低質な部隊に置き換えられた。

1900年5月下旬から、ボーア人のゲリラ戦略の最初の成功は、リンドレー(500人のヨーマンリーが降伏)とハイルブロン(大規模な護送隊とその護衛が捕獲された)およびその他の小競り合いで、10日足らずで1,500人のイギリス軍の死傷者を出した。1900年12月、デ・ラ・レイとクリスティアーン・ベイヤースは、ノーイトゲダハトでイギリス旅団を攻撃して壊滅させ、650人以上の死傷者を出した。これらとその他のボーア人の成功の結果、キッチナー卿率いるイギリス軍は、クリスティアーン・デ・ヴェットの大規模な捜索を3回行ったが、成功しなかった。しかし、イギリス軍のキャンプやその他の標的に対するボーア人の襲撃は散発的で計画性が低く、ボーア人のゲリラ戦争自体の性質上、単にイギリス軍を悩ませることを除いて、全体的な長期目標はほとんどなかった。これにより、この地域全体でイギリス人とボーア人の間で散発的な戦闘が無秩序に発生することになった。
ブロックハウスの使用
イギリス軍はすぐに戦術の修正を余儀なくされた。彼らはボーア軍特殊部隊の移動の自由を制限し、現地からの支援を奪うことに集中した。鉄道は重要な通信・補給線であり、イギリス軍が南アフリカ全土に進軍するにつれ、装甲列車を使用し、要所に要塞化されたブロックハウスを設置した。 [74]彼らはさらにブロックハウス(それぞれ6人から8人の兵士を収容)を建設し、ボーア軍の襲撃者から補給路を守るためにこれを強化した。最終的に、南アフリカの2つの共和国に約8,000のブロックハウスが建設され、主要ルート沿いの大きな町から放射状に広がった。ブロックハウス1棟の費用は800ポンドから1,000ポンドで、建設には約3か月かかった。費用はかかったが、ブロックハウスは非常に効果的であることが証明された。ブロックハウスが設置され、人が配置された橋は1つも爆破されなかった。[74]
ブロックハウス システムは、駐屯に膨大な数の兵士を必要とした。50,000 人以上のイギリス軍、つまり 50 個大隊がブロックハウスの任務に就いた。これはゲリラ戦期に戦場にいた約 30,000 人のボーア人よりも多かった。さらに、武装警備員として、また夜間に前線を巡回するために、最大 16,000 人のアフリカ人が使用された。[74]陸軍は、ブロックハウスを有刺鉄線のフェンスで結び、広い草原を小さなエリアに分割した。「ニュー モデル」のドライブが設置され、その下では、散在する列で田舎を捜索する以前の非効率的な方法とは異なり、ブロックハウスの線で区切られた草原のエリアを連続した部隊の列で掃討することができた。
民間人に対する焦土作戦
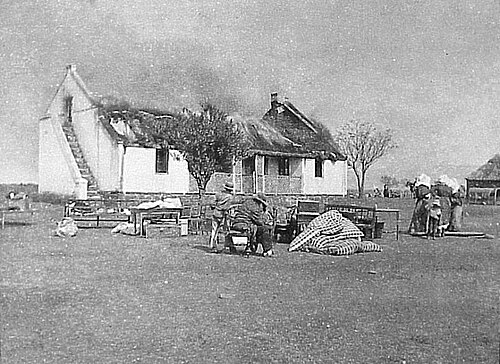
イギリス軍はまた、ボーア人の生存を困難にするため、支配地域内でボーア人ゲリラに食料を与える可能性のあるものすべてを標的とする焦土作戦を実行した。イギリス軍が田舎を掃討すると、彼らは組織的に作物を破壊し、家屋や農場を焼き払い、ボーア人とアフリカ人の男性、女性、子供、労働者を強制収容所に収容した。最後に、イギリス軍は掃討部隊を支援するために独自の騎馬襲撃部隊も設立した。これらは、掃討部隊が追いつくまでボーア人を迅速に追跡し、容赦なく嫌がらせを行い、彼らを遅らせ、逃げ道を断つことを目的としていた。イギリスがこのような攻撃に参加するために編成した約90の機動部隊の多くは、イギリス軍と植民地軍の混成だったが、武装したアフリカ人も少数ながら含まれていた。これらの部隊に所属する武装したアフリカ人の総数は2万人と推定されている。
イギリス軍は、味方を変えて「国民スカウト」として入隊するよう説得されたボーア人の補助兵も利用した。アンドリース・クロニエ将軍(1849-1923)の指揮下で活動した国民スカウトは、雑兵として軽蔑されていたが、戦争の終わりまでに戦闘に参加したアフリカーナーの5分の1を占めるまでになった。[75]
イギリス軍は戦争中ずっと装甲列車を利用して、事件発生時(ボーア軍の防御壁や縦隊への攻撃など)に即応部隊をより迅速に派遣したり、退却するボーア軍の縦隊の前に部隊を降ろしたりした。
平和委員会
戦闘をやめたブルガー人の間では、まだ戦闘中の人々に戦闘をやめるよう説得するため、和平委員会を結成することが決定された。1900年12月、キッチナー卿はプレトリアで中央ブルガー平和委員会を発足させる許可を与えた。1900年末までに、ブルガー人に戦闘をやめるよう説得するため、約30人の使節が各地区に派遣され、地方の和平委員会を結成した。この組織には、ピエト・デ・ウェット将軍やアンドリース・クロニエ将軍など、ボーア人の元指導者たちが関わっていた。マイヤー・デ・コックは、和平委員会の使節の中で唯一、大逆罪で有罪となり銃殺刑に処された。[76]
ジョイナー
一部の市民はボーア人との戦いでイギリス軍に加わった。1902年5月の戦闘終了までに、5,464人もの市民がイギリス軍のために働いていた。[77]
オレンジ自由州

After having conferred with the Transvaal leaders, de Wet returned to the Orange Free State, where he inspired a series of successful attacks and raids in the western part of the country, though he suffered a rare defeat at Bothaville in November 1900. Many Boers who had earlier returned to their farms and towns, sometimes after being given formal parole by the British, took up arms again. In late January 1901, De Wet led a renewed invasion of Cape Colony. This was less successful, because there was no general uprising among the Cape Boers, and De Wet's men were hampered by bad weather and relentlessly pursued by British forces. They narrowly escaped across the Orange River.
From then until the final days of the war, De Wet remained comparatively quiet, rarely attacking British army camps and columns partly because the Orange Free State was effectively left desolate by British sweeps. In late 1901, De Wet overran an isolated British detachment at Groenkop, inflicting heavy casualties. This prompted Kitchener to launch the first of the "New Model" drives against him. De Wet escaped the first such drive but lost 300 of his fighters. This was a severe loss, and a portent of further attrition, although the subsequent attempts to round up De Wet were badly handled, and De Wet's forces avoided capture.
Western Transvaal
The Boer commandos in the Western Transvaal were very active after September 1901. Several battles of importance were fought there between September 1901 and March 1902. At Moedwil on 30 September 1901 and again at Driefontein on 24 October, General Koos De La Rey's forces attacked British camps and outposts but were forced to withdraw after the British offered strong resistance.
From late 1901 to early 1902, a time of relative quiet descended on the western Transvaal. February 1902 saw the next major battle in that region. On 25 February, De La Rey attacked a British column under Lieutenant-Colonel S. B. von Donop at Ysterspruit near Wolmaransstad. De La Rey succeeded in capturing many men and a large amount of ammunition. The Boer attacks prompted Lord Methuen, the British second-in-command after Kitchener, to move his column from Vryburg to Klerksdorp to deal with De La Rey. On the morning of 7 March 1902, the Boers attacked the rear guard of Methuen's moving column at Tweebosch. Confusion reigned in British ranks and Methuen was wounded and captured by the Boers.
The Boer victories in the west led to stronger action by the British. In the second half of March 1902, large British reinforcements were sent to the Western Transvaal under the direction of Ian Hamilton. The opportunity the British were waiting for arose on 11 April 1902 at Rooiwal, where a commando led by General Jan Kemp and Commandant Potgieter attacked a superior force under Kekewich. The British soldiers were well positioned on the hillside and inflicted severe casualties on the Boers charging on horseback over a large distance, beating them back. This was the end of the war in the Western Transvaal and also the last major battle of the war.
Eastern Transvaal
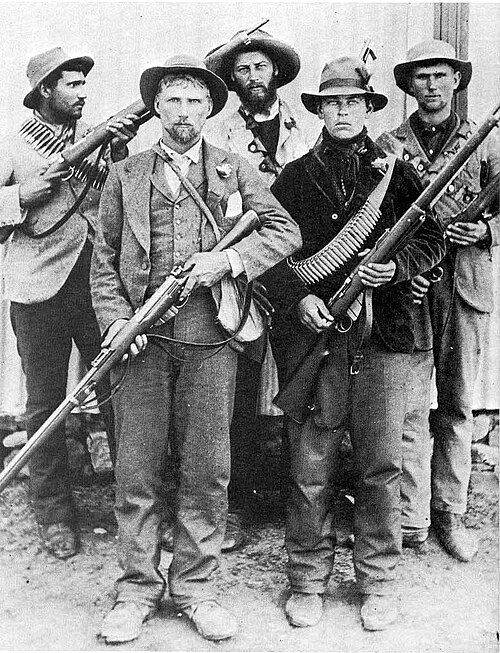
Two Boer forces fought in this area, one under Botha in the south east and a second under Ben Viljoen in the north east around Lydenburg. Botha's forces were particularly active, raiding railways and British supply convoys, and even mounting a renewed invasion of Natal in September 1901. After defeating British mounted infantry in the Battle of Blood River Poort near Dundee, Botha was forced to withdraw by heavy rains that made movement difficult and crippled his horses. Back on the Transvaal territory around his home district of Vryheid, Botha attacked a British raiding column at Bakenlaagte, using an effective mounted charge. One of the most active British units was effectively destroyed in this engagement. This made Botha's forces the target of increasingly large scorched earth drives by British forces, in which the British made particular use of native scouts and informers. Eventually, Botha had to abandon the high veld and retreat to a narrow enclave bordering Swaziland.
To the north, Ben Viljoen grew steadily less active. His forces mounted comparatively few attacks and as a result, the Boer enclave around Lydenburg was largely unmolested. Viljoen was eventually captured.
Cape Colony
In parts of Cape Colony, particularly the Cape Midlands District where Boers formed a majority of the white inhabitants, the British had always feared a general uprising against them. In fact, no such uprising ever took place, even in the early days of the war when Boer armies had advanced across the Orange. The cautious conduct of some of the elderly Orange Free State generals had been one factor that discouraged the Cape Boers from siding with the Boer republics. Nevertheless, there was widespread pro-Boer sympathy. Some of the Cape Dutch volunteered to help the British, but a much larger number volunteered to help the other side. The political factor was more important than the military: the Cape Dutch, according to Milner 90 percent of whom favoured the rebels, controlled the provincial legislature, and it's authorities forbade the British Army to burn farms or to force Boer civilians into concentration camps.[78] The British had more limited options to suppress the insurgency in the Cape Colony as result.
After he escaped across the Orange in March 1901, de Wet had left forces under Cape rebels Kritzinger and Gideon Scheepers to maintain a guerrilla campaign in the Cape Midlands. The campaign here was one of the least chivalrous of the war, with intimidation by both sides of each other's civilian sympathisers. In one of many skirmishes, Commandant Johannes Lötter's small commando was tracked down by a much-superior British column and wiped out at Groenkloof. Several captured Boers, including Lotter and Scheepers, who was captured when he fell ill with appendicitis, were executed by the British for treason or for capital crimes such as the murder of British prisoners or of unarmed civilians. Some of the executions took place in public, to deter further disaffection.
Fresh Boer forces under Jan Christiaan Smuts, joined by the surviving rebels under Kritzinger, made another attack on the Cape in September 1901. They suffered severe hardships and were hard pressed by British columns, but eventually rescued themselves by routing some of their pursuers at the Battle of Elands River and capturing their equipment. From then until the end of the war, Smuts increased his forces from among Cape rebels until they numbered 3,000. However, no general uprising took place, and the situation in the Cape remained stalemated.
In January 1902, Boer leader Manie Maritz was implicated in the Leliefontein massacre in the far Northern Cape.
Boer foreign volunteers
While no other government actively supported the Boer cause, individuals from several countries volunteered and formed Foreign Volunteer Units. These primarily came from Europe, particularly the Netherlands, Germany and Sweden-Norway. Other countries such as France, Italy, Ireland (then part of the United Kingdom), and restive areas of the Russian Empire, including Poland and Georgia, also formed smaller volunteer corps. Finns fought in the Scandinavian Corps. Two volunteers, George Henri Anne-Marie Victor de Villebois-Mareuil of France and Yevgeny Maximov of Russia, became veggeneraals (fighting generals) of the South African Republic.[79]
Conclusion


Towards the end of the war in the early months of 1902, British tactics of containment, denial, and harassment finally began to yield results against the Boer guerrillas. The sourcing and co-ordination of intelligence became increasingly efficient with regular reporting from observers in the blockhouses, from units patrolling the fences and conducting "sweeper" operations, and from native Africans in rural areas who increasingly supplied intelligence, as the Scorched Earth policy took effect and they found themselves competing with the Boers for food supplies. Kitchener's forces at last began to seriously affect the Boers' fighting strength and freedom of manoeuvre, and made it harder for the Boers and their families to survive. Despite this success, almost half the Boer fighting strength, around 15,000 men, were still in the field fighting by May 1902. However, Kitchener's tactics were very costly: Britain was running out of time, patience, and money needed for the war.[80]
The British offered terms of peace on various occasions, notably in March 1901, but were rejected by Botha and the "Bitter-enders" among the Boers. They pledged to fight until the bitter end and rejected the demand for compromise made by the "Hands-uppers". Their reasons included hatred of the British, loyalty to their dead comrades, solidarity with fellow commandos, an intense desire for independence, religious arguments, and fear of captivity or punishment. On the other hand, their women and children were dying nearly every day in prison camps and independence seemed more and more impossible.[81]
The last of the Boers finally surrendered in May 1902 and the war ended with the Treaty of Vereeniging signed on 31 May 1902. After a period of obstinacy, the British reneged and offered the Boers generous terms of conditional surrender in order to bring the war to a victorious conclusion. The Boers were given £3,000,000 for reconstruction and were promised eventual limited self-government, which was granted in 1906 and 1907. The treaty ended the existence of the Transvaal and Orange Free State as independent Boer republics and placed them within the British Empire. The Union of South Africa was established as a dominion of the British Empire in 1910.
Nonwhite roles
The policy on both sides was to minimise the role of nonwhites, but the need for manpower continuously stretched those resolves. At the battle of Spion Kop in Ladysmith, Mohandas K. Gandhi with 300 free burgher Indians and 800 indentured Indian labourers started the Ambulance Corps serving the British side. As the war raged across African farms and their homes were destroyed, many became refugees and they, like the Boers, moved to the towns where the British hastily created internment camps. Subsequently, the British scorched earth policies were applied to both Boers and Africans. Although most black Africans were not considered by the British to be hostile, many tens of thousands were also forcibly removed from Boer areas and also placed in concentration camps.[citation needed] Africans were held separately from Boer internees.[citation needed] Eventually there were a total of 64 tented camps for Africans. Conditions were as bad as in the camps for the Boers, but even though, after the Fawcett Commission report, conditions improved in the Boer camps, "improvements were much slower in coming to the black camps"; 20,000 died there.[82]
The Boers and the British both feared the consequences of arming Africans. The memories of the Zulu and other tribal conflicts were still fresh, and they recognised that whoever won would have to deal with the consequences of a mass militarisation of the tribes. There was therefore an unwritten agreement that this war would be a "white man's war."[citation needed] At the outset, British officials instructed all white magistrates in the Natal Colony to appeal to Zulu amakhosi (chiefs) to remain neutral, and President Kruger sent emissaries asking them to stay out of it. However, in some cases there were old scores to be settled, and some Africans, such as the Swazis, were eager to enter the war with the specific aim of reclaiming land won by the Boers.[citation needed] As the war went on there was greater involvement of Africans, and in particular large numbers became embroiled in the conflict on the British side, either voluntarily or involuntarily. By the end of the war, many Africans had been armed and had shown conspicuous gallantry in roles such as scouts, messengers, watchmen in blockhouses, and auxiliaries.[citation needed]
And there were more flash points outside of the war. On 6 May 1902 at Holkrantz in the southeastern Transvaal, a Zulu faction had their cattle stolen and their women and children tortured by the Boers as a punishment for assisting the British. The local Boer officer then sent an insulting message to the tribe, challenging them to take back their cattle. The Zulus attacked at night, and in a mutual bloodbath, the Boers lost 56 killed and 3 wounded, while the Africans suffered 52 killed and 48 wounded.[21]: 601
About 10,000 black men were attached to Boer units where they performed camp duties; a handful unofficially fought in combat. The British Army employed over 14,000 Africans as wagon drivers. Even more had combatant roles as spies, guides, and eventually as soldiers. By 1902 there were about 30,000 armed Africans in the British Army.[83]
Concentration camps

The term "concentration camp" was used to describe camps operated by the British in South Africa during this conflict in the years 1900–1902, and the term grew in prominence during this period.
The camps had originally been set up by the British Army as "refugee camps" to provide refuge for civilian families who had been forced to abandon their homes for whatever reason related to the war. However, when Kitchener took over in late 1900, he introduced new tactics in an attempt to break the guerrilla campaign and the influx of civilians grew dramatically as a result. Disease and starvation killed thousands.[14][84][85] Kitchener initiated plans to
... flush out guerrillas in a series of systematic drives, organised like a sporting shoot, with success defined in a weekly 'bag' of killed, captured and wounded, and to sweep the country bare of everything that could give sustenance to the guerrillas, including women and children ... It was the clearance of civilians—uprooting a whole nation—that would come to dominate the last phase of the war.
— Pakenham, The Boer War[21]: 493

.jpg/500px-Bronkerspruit,_c.1901._(22702453419).jpg)
As Boer farms were destroyed by the British under their "Scorched Earth" policy—including the systematic destruction of crops and slaughtering of livestock, the burning down of homesteads and farms—to prevent the Boers from resupplying from a home base, many tens of thousands of women and children were forcibly moved into the concentration camps. This was not the first appearance of internment camps, as the Spanish had used internment in Cuba in the Ten Years' War, and the Americans in the Philippine–American War,[86] but the Boer War concentration camp system was the first time that a whole nation had been systematically targeted, and the first in which whole regions had been depopulated.
Eventually, there were a total of 45 tented camps built for Boer internees and 64 for black Africans. Of the 28,000 Boer men captured as prisoners of war, 25,630 were sent overseas to prisoner-of-war camps throughout the British Empire. The vast majority of Boers remaining in the local camps were women and children. Around 26,370 Boer women and children were to perish in these concentration camps.[87] Of the more than 120,000 Blacks (and Coloureds) imprisoned too, around 20,000 died.[88][85][89]
The camps were poorly administered from the outset and became increasingly overcrowded when Kitchener's troops implemented the internment strategy on a vast scale. Conditions were terrible for the health of the internees, mainly due to neglect, poor hygiene and bad sanitation. The supply of all items was unreliable, partly because of the constant disruption of communication lines by the Boers. The food rations were meagre and there was a two-tier allocation policy, whereby families of men who were still fighting were routinely given smaller rations than others.[21]: 505 The inadequate shelter, poor diet, bad hygiene and overcrowding led to malnutrition and endemic contagious diseases such as measles, typhoid, and dysentery, to which the children were particularly vulnerable.[90] Coupled with a shortage of modern medical facilities, many of the internees died. While much of the British press, including The Times, played down the problems in the camps, Emily Hobhouse helped raise public awareness in Britain of the atrocious conditions, as well as being instrumental in bringing relief to the concentration camps.[91]
Cost of the war
It is estimated that the total cost of the war to the British government was £211,156, 000[92] (equivalent to £19.9bn in 2022).
War crimes trial
The Boer War also saw the first war crimes prosecutions in British military history. They centered around the Bushveldt Carbineers (BVC), a British Army irregular regiment of mounted rifles active in the Northern Transvaal. Originally raised in February 1901, the BVC was composed mainly of British and Commonwealth servicemen with a generous admixture of defectors from the Boer Commandos.[95] On 4 October 1901, a letter signed by 15 members of the Bushveldt Carbineers (BVC) garrison at Fort Edward was secretly dispatched to Col. F.H. Hall, the British Army Officer Commanding at Pietersburg. Written by BVC Trooper Robert Mitchell Cochrane, a former justice of the peace from Western Australia,[96][97] the letter accused members of the Fort Edward garrison of six "disgraceful incidents":
1. The shooting of six surrendered Afrikaner men and boys and the theft of their money and livestock at Valdezia on 2 July 1901. The orders had been given by Captains Alfred Taylor and James Huntley Robertson, and relayed by Sgt. Maj. K.C.B. Morrison to Sgt. D.C. Oldham. The actual killing was alleged to have been carried out by Sgt. Oldham and BVC Troopers Eden, Arnold, Brown, Heath, and Dale.[98]
2. The shooting of BVC Trooper B.J. van Buuren by BVC Lt. Peter Handcock on 4 July 1901. Trooper van Buuren, an Afrikaner, had "disapproved" of the killings at Valdezia, and had informed the victims' wives and children, who were imprisoned at Fort Edward, of what had happened.[99]
3. The revenge killing of Floris Visser, a wounded prisoner of war, near the Koedoes River on 11 August 1901. Visser had been captured by a BVC patrol led by Lieut. Harry Morant two days before his death. After Visser had been exhaustively interrogated and conveyed for 15 miles by the patrol, Lt. Morant had ordered his men to form a firing squad and shoot him. The squad consisted of BVC Troopers A.J. Petrie, J.J. Gill, Wild, and T.J. Botha. A coup de grâce was delivered by BVC Lt. Harry Picton. The slaying of Floris Visser was in retaliation for the combat death of Morant's close friend, BVC Captain Percy Frederik Hunt, at Duivelskloof on 6 August 1901.[100]
4. The shooting, ordered by Capt. Taylor and Lt. Morant, of four surrendered Afrikaners and four Dutch schoolteachers, who had been captured at the Elim Hospital in Valdezia, on the morning of 23 August 1901. The firing squad consisted of BVC Lt. George Witton, Sgt. D.C. Oldham, and Troopers J.T. Arnold, Edward Brown, T. Dale, and A. Heath. Although Trooper Cochrane's letter made no mention of the fact, three Native South African witnesses were also shot dead.[101]
The ambush and fatal shooting of the Reverend Carl August Daniel Heese of the Berlin Missionary Society near Bandolierkop on the afternoon of 23 August 1901. Rev. Heese had spiritually counseled the Dutch and Afrikaner victims that morning and had angrily protested to Lt. Morant at Fort Edward upon learning of their deaths. Trooper Cochrane alleged that the killer of Rev. Heese was BVC Lt. Peter Handcock. Although Cochrane made no mention of the fact, Rev. Heese's driver, a member of the Southern Ndebele people, was also killed.[102]
5. The orders, given by BVC Lt. Charles H.G. Hannam, to open fire on a wagon train containing Afrikaner women and children who were coming in to surrender at Fort Edward, on 5 September 1901. The ensuing gunfire led to the deaths of two boys, aged 5- and 13-years, and the wounding of a 9-year-old girl.[103]
6. The shooting of Roelf van Staden and his sons Roelf and Christiaan, near Fort Edward on 7 September 1901. All were coming in to surrender in the hope of gaining medical treatment for teenaged Christiaan, who was suffering from recurring bouts of fever. Instead, they were met at the Sweetwaters Farm near Fort Edward by a party consisting of Lts. Morant and Handcock, joined by BVC Sgt. Maj. Hammet, Corp. MacMahon, and Troopers Hodds, Botha, and Thompson. Roelf van Staden and both his sons were then shot, allegedly after being forced to dig their own graves.[104]
The letter then accused the Field Commander of the BVC, Major Robert William Lenehan, of being "privy to these misdeamenours. It is for this reason that we have taken the liberty of addressing this communication direct to you." After listing numerous civilian witnesses who could confirm their allegations, Trooper Cochrane concluded, "Sir, many of us are Australians who have fought throughout nearly the whole war while others are Africaners who have fought from Colenso till now. We cannot return home with the stigma of these crimes attached to our names. Therefore we humbly pray that a full and exhaustive inquiry be made by Imperial officers in order that the truth be elicited and justice done. Also we beg that all witnesses may be kept in camp at Pietersburg till the inquiry is finished. So deeply do we deplore the opprobrium which must be inseparably attached to these crimes that scarcely a man once his time is up can be prevailed to re-enlist in this corps. Trusting for the credit of thinking you will grant the inquiry we seek."[105] In response to the letter written by Trooper Cochrane, Col. Hall summoned all Fort Edward officers and non-commissioned officers to Pietersburg on 21 October 1901. All were met by a party of mounted infantry five miles outside Pietersburg on the morning of 23 October 1901 and "brought into town like criminals". Lt. Morant was arrested after returning from leave in Pretoria, where he had gone to settle the affairs of his deceased friend Captain Hunt.[106]

Although the trial transcripts, like almost all others dating from between 1850 and 1914, were later destroyed by the Civil Service,[107] it is known that a Court of Inquiry, the British military's equivalent to a grand jury, was convened on 16 October 1901. The President of the Court was Col. H.M. Carter, who was assisted by Captain E. Evans and Major Wilfred N. Bolton, the Provost Marshal of Pietersburg. The first session of the Court took place on 6 November 1901 and continued for four weeks. Deliberations continued for a further two weeks,[108] at which time it became clear that the indictments would be as follows:
1. In what became known as "The Six Boers Case", Captains Robertson and Taylor, as well as Sgt. Maj. Morrison, were charged with committing the offense of murder while on active service.[109]
2. In relation to what was dubbed "The Van Buuren Incident", Maj. Lenahan was charged with, "When on active service by culpable neglect failing to make a report which it was his duty to make."[110]
3. In relation to "The Visser Incident", Lts. Morant, Handcock, Witton, and Picton were charged with "While on active service committing the offense of murder".[111]
4. In relation to what was incorrectly dubbed "The Eight Boers Case", Lieuts. Morant, Handcock, and Witton were charged with, "While on active service committing the offense of murder".[112]
In relation to the slaying of Rev Heese, Lts. Morant and Handcock were charged with, "While on active service committing the offense of murder".
5. No charges were filed for the three children who had been shot by the Bushveldt Carbineers near Fort Edward.[113]
6. In relation to what became known as "The Three Boers Case", Lts. Morant and Handcock were charged with, "While on active service committing the offense of murder".[112]
Following the indictments, Maj. R. Whigham and Col. James St. Clair ordered Bolton to appear for the prosecution, as he was considered less expensive than hiring a barrister.[114] Bolton vainly requested to be excused, writing, "My knowledge of law is insufficient for so intricate a matter."[115] The first court martial opened on 16 January 1901, with Lieut.-Col. H.C. Denny presiding over a panel of six judges. Maj. J.F. Thomas, a solicitor from Tenterfield, New South Wales, had been retained to defend Maj. Lenahan. The night before, however, he agreed to represent all six defendants.[108] The "Visser Incident" was the first case to go to trial. Lt. Morant's former orderly and interpreter, BVC Trooper Theunis J. Botha, testified that Visser, who had been promised that his life would be spared, was cooperative during two days of interrogation and that all his information was later found to have been true. Despite this, Lt. Morant ordered him shot.[116] In response, Lt. Morant testified that he only followed orders to take no prisoners as relayed to the late Captain Hunt by Col. Hubert Hamilton. He also alleged that Floris Visser had been captured wearing a British Army jacket and that Captain Hunt's body had been mutilated.[117] In response, the court moved to Pretoria, where Col. Hamilton testified that he had "never spoken to Captain Hunt with reference to his duties in the Northern Transvaal". Though stunned, Maj. Thomas argued that his clients were not guilty because they believed that they "acted under orders". In response, Maj. Bolton argued that they were "illegal orders" and said, "The right of killing an armed man exists only so long as he resists; as soon as he submits he is entitled to be treated as a prisoner of war." The Court ruled in Maj. Bolton's favor.[118] Lt. Morant was found guilty of murder. Lts. Handcock, Witton, and Picton were convicted of the lesser charge of manslaughter.[119]
On 27 February 1902, two British Army Lieutenants — Anglo-Australian Harry Morant and Australian born Peter Handcock of the Bushveldt Carbineers — were executed by firing squad after being convicted of murdering eight Afrikaner POWs. This court-martial for war crimes was one of the first such prosecutions in British military history. Although Morant left a written confession in his cell, he went on to become a folk hero in modern Australia. Believed by many Australians to be the victim of a kangaroo court, public appeals have been made for Morant to be retried or pardoned. His court-martial and death have been the subject of books, a stage play, and an award-winning Australian New Wave film adaptation by director Bruce Beresford. Witton was sentenced to death, but reprieved. Due to immense political pressure for his release, he was released after serving 32 months of a life sentence. Picton was cashiered.[120][121]
Aftermath and analysis

The Second Boer War cast long shadows over the history of the South African region. The predominantly agrarian society of the former Boer republics was profoundly and fundamentally affected by the scorched earth policy of Roberts and Kitchener. The devastation of both Boer and black African populations in the concentration camps and through war and exile were to have a lasting effect on the demography and quality of life in the region.
Many exiles and prisoners were unable to return to their farms at all; others attempted to do so but were forced to abandon the farms as unworkable given the damage caused by farm burning in the course of the scorched earth policy. Destitute Boers and black Africans swelled the ranks of the unskilled urban poor competing with the "uitlanders" in the mines.[122]
The postwar reconstruction administration was presided over by Lord Milner and his largely Oxford-educated Milner's Kindergarten. This small group of civil servants had a profound effect on the region, eventually leading to the Union of South Africa:
In the aftermath of the war, an imperial administration freed from accountability to a domestic electorate set about reconstructing an economy that was by then predicated unambiguously on gold. At the same time, British civil servants, municipal officials, and their cultural adjuncts were hard at work in the heartland of the former Boer Republics helping to forge new identities—first as 'British South Africans' and then, later still, as 'white South Africans'.[citation needed]
Some scholars, for good reasons, identify these new identities as partly underpinning the act of union that followed in 1910. Although challenged by a Boer rebellion only four years later, they did much to shape South African politics between the two world wars and right up to the present day.[123]
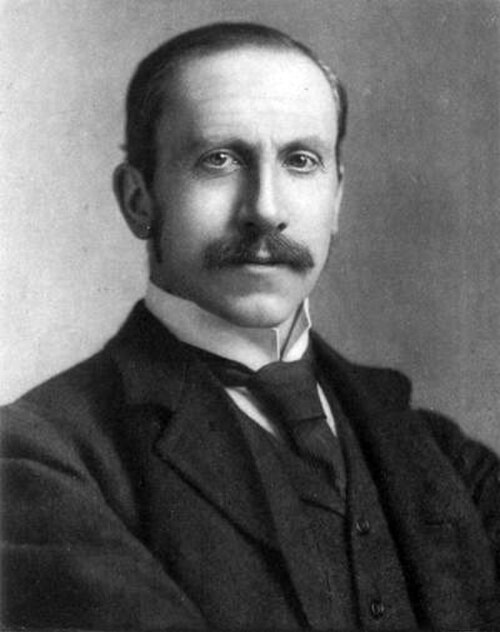
The counterinsurgency techniques and lessons (the restriction of movement, the containment of space, the ruthless targeting of anything, everything and anyone that could give sustenance to guerrillas, the relentless harassment through sweeper groups coupled with rapid reaction forces, the sourcing and co-ordination of intelligence, and the nurturing of native allies) learned during the Boer War were used by the British (and other forces) in future guerrilla campaigns including to counter Malayan communist rebels during the Malayan Emergency. In World War II the British also adopted some of the concepts of raiding from the Boer commandos when, after the fall of France, they set up their special raiding forces, and in acknowledgement of their erstwhile enemies, chose the name British Commandos.
Many of the Boers referred to the war as the second of the Freedom Wars. The most resistant of Boers wanted to continue the fight and were known as "Bittereinders" (or irreconcilables) and at the end of the war a number of Boer fighters such as Deneys Reitz chose exile rather than sign an oath, such as the following, to pledge allegiance to Britain:[124]
The bearer, <prisoner name> has been released from prison of war camp <Camp name> on signing that he acknowledge terms of surrender and becomes a British subject.
Over the following decade, many returned to South Africa and never signed the pledge. Some, like Reitz, eventually reconciled themselves to the new status quo, but others did not.
Union of South Africa
One of the most important events in the decade after the end of the war was the creation of the Union of South Africa (later the Republic of South Africa). It proved a key ally to Britain as a Dominion of the British Empire during the World Wars. At the start of the First World War a crisis ensued when the South African government led by Louis Botha and other former Boer fighters, such as Jan Smuts, declared support for Britain and agreed to send troops to take over the German colony of German South-West Africa (Namibia).
Many Boers were opposed to fighting for Britain, especially against Germany, which had been sympathetic to their struggle. A number of bittereinders and their allies took part in a revolt known as the Maritz Rebellion. This was quickly suppressed, and in 1916 the leading Boer rebels in the Maritz Rebellion escaped lightly (especially compared with the fate of leading Irish rebels of the Easter Rising), with terms of imprisonment of six and seven years and heavy fines. Two years later, they were released from prison, as Louis Botha recognised the value of reconciliation.
Effect of the war on domestic British politics

Many Irish nationalists sympathised with the Boers, viewing them to be a people oppressed by British imperialism, much like they viewed themselves. Irish miners already in the Transvaal at the start of the war formed the nucleus of two Irish commandos. The Second Irish Brigade was headed up by an Australian of Irish parents, Colonel Arthur Lynch. In addition, small groups of Irish volunteers went to South Africa to fight with the Boers—this despite the fact that there were many Irish troops fighting in the British army, including the Royal Dublin Fusiliers.[g] In Britain, the "Pro-Boer" campaign expanded,[h] with writers often idealising the Boer society.
The war also highlighted the dangers of Britain's policy of non-alignment and deepened her isolation. The 1900 UK general election, also known as the "Khaki election", was called by the Prime Minister, Lord Salisbury, on the back of recent British victories. There was much enthusiasm for the war at this point, resulting in a victory for the Conservative government.
However, public support quickly waned as it became apparent that the war would not be easy and it dragged on, partially contributing to the Conservatives' spectacular defeat in 1906. There was public outrage at the use of scorched earth tactics and at the conditions in the concentration camps. It also became apparent that there were serious problems with public health in Britain since up to 40% of recruits in Britain were unfit for military service and suffered from medical problems such as rickets and other poverty-related illnesses. That came at a time of increasing concern for the state of the poor in Britain.
Having taken the country into a prolonged war, the Conservative government was rejected by the electorate at the first general election after the war was over. Balfour succeeded his uncle, Lord Salisbury in 1903, immediately after the war, took over a Conservative Party that had won two successive landslide majorities but led it to a landslide defeat in 1906.
The 2nd Anglo-Boer War was a victory that costed British taxpayers more than £200m; 22,000 Empire troops, and more than 400,000 army horses, donkeys and mules were killed. Britain had expected a swift victory against a mostly unmilitarised and predominantly agricultural-based opponent. However, the conflict dragged on into the 20th century and the reign of a new monarch.[126] At the time, Britain was the world's most technologically advanced military. The results caused many both domestically and internationally to question the dominance of the British Empire, especially as nations like the United States, Germany, and Japan had started to become major powers.
Horses

The number of horses killed in the war was at the time unprecedented in modern warfare. For example, in the relief of Kimberley, French's cavalry rode 500 horses to their deaths in a single day. The wastage was particularly heavy among British forces for several reasons: overloading of horses with unnecessary equipment and saddlery, failure to rest and acclimatise horses after long sea voyages and, later in the war, poor management by inexperienced mounted troops and distant control by unsympathetic staffs.[127][128] The average life expectancy of a British horse, from the time of its arrival in Port Elizabeth, was around six weeks.[129]: 213–214
Most of the horses and mules brought to South Africa during the war came from the United States. In total, 109,878 horses and 81,524 mules were shipped from New Orleans to South Africa in 166 voyages from October 1899 to June 1902. The cost of these animals and their transport was an average of US$597,978 per month. A significant number of horses and mules died during the transit across the Atlantic; for example, during the SS Manchester City's 36-day passage, 187 of her 2,090 mules died.[130]
Horses were slaughtered for their meat when needed. During the sieges of Kimberley and Ladysmith, horses were consumed as food once the regular sources of meat were depleted.[131] The besieged British forces in Ladysmith also produced chevril, a Bovril-like paste, by boiling down the horse meat to a jelly paste and serving it like beef tea.[132][133]
The Horse Memorial in Port Elizabeth is a tribute to the 300,000 horses that died during the conflict.[134]
Imperial involvement
The vast majority of troops fighting for the British army came from Great Britain. Yet a significant number came from other parts of the British Empire. These countries had their own internal disputes over whether they should remain tied to London, or have full independence, which carried over into the debate around the sending of forces to assist the war. Though not fully independent on foreign affairs, these countries did have local say over how much support to provide, and the manner it was provided. Ultimately, Australia, Canada, New Zealand, and British South African Company-administered Rhodesia all sent volunteers to aid the United Kingdom. Troops were also raised to fight with the British from the Cape Colony and Natal. Some Boer fighters, such as Smuts and Botha, were technically British subjects as they came from the Cape Colony and Colony of Natal, respectively.[citation needed]
There were also many volunteers from the Empire who were not selected for the official contingents from their countries and travelled privately to South Africa to form private units, such as the Canadian Scouts and Doyle's Australian Scouts. There were also some European volunteer units from British India and British Ceylon, though the British Government refused offers of non-white troops from the Empire. Some Cape Coloureds also volunteered early in the war, but later some of them were effectively conscripted and kept in segregated units. As a community, they received comparatively little reward for their services. In many ways, the war set the pattern for the Empire's later involvement in the two World Wars. Specially raised units, consisting mainly of volunteers, were dispatched overseas to serve with forces from elsewhere in the British Empire.
The United States stayed neutral in the conflict, but some American citizens were eager to participate. Early in the war Lord Roberts cabled Burnham, a veteran of both Matabele wars but at that very moment prospecting in the Klondike, to serve on his personal staff as Chief of Scouts. Burnham went on to receive the highest awards of any American who served in the war, but American mercenaries participated on both sides.[135]
Australia

From 1899 to 1901 the six separate self-governing colonies in Australia sent their own contingents to serve in the Boer War. That much of the population of the colonies had originated from Great Britain explains a general desire to support Britain during the conflict. After the colonies formed the Commonwealth of Australia in 1901, the new Government of Australia sent "Commonwealth" contingents to the war.[136] The Boer War was thus the first war in which the Commonwealth of Australia fought. A few Australians fought on the Boer side.[137] The most famous and colourful character was Colonel Arthur Alfred Lynch, formerly of Ballarat, Victoria, who raised the Second Irish Brigade.
The Australian climate and geography were far closer to that of South Africa than most other parts of the empire, so Australians adapted quickly to the environment, with troops serving mostly among the army's "mounted rifles". Enlistment in all official Australian contingents totalled 16,463.[138] Another five to seven thousand Australians served in "irregular" regiments raised in South Africa. Perhaps five hundred Australian irregulars were killed. In total 20,000 or more Australians served and about 1,000 were killed. A total of 267 died from disease, 251 were killed in action or died from wounds sustained in battle. A further 43 men were reported missing.[139]
When the war began some Australians, like some Britons, opposed it. As the war dragged on some Australians became disenchanted, in part because of the sufferings of Boer civilians reported in the press. In an interesting twist (for Australians), when the British missed capturing President Paul Kruger, as he escaped Pretoria during its fall in June 1900, a Melbourne Punch, 21 June 1900, cartoon depicted how the War could be won, using the Kelly Gang.[140]
The convictions and executions of two Australian lieutenants, Harry Harbord Morant, colloquially known as 'The Breaker' for his skill with horses, and Peter Handcock in 1902, and the imprisonment of a third, George Witton, had minimal impact on the Australian public at the time despite later legend[citation needed]. The controversial court-martial saw the three convicted of executing Boer prisoners under their authority. After the war, though, Australians joined an empire-wide campaign that saw Witton released from jail. Much later,[citation needed] some Australians came to see the execution of Morant and Handcock as instances of wrongfully executed Australians, as illustrated in the 1980 Australian film Breaker Morant.
It is believed that up to 50 Aboriginal Australians served in the Boer War as trackers. According to Dale Kerwin, an Indigenous research fellow at Griffith University, such is the lack of information that is available about the trackers it is even uncertain as to whether they returned to Australia at the end of the war. He has claimed that at the end of the war in 1902 when the Australian contingents returned the trackers may not have been allowed back to Australia due to the White Australia Policy.[141]
Canada

Wikisource has original text related to this article:
Canadian Appeal for the Widows and Orphans of the South African War

A total of around 8000 Canadians arrived in South Africa to fight for Britain. These arrived in two contingents: the first on 30 October 1899, the second on 21 January 1900. A third contingent of cavalry (Strathcona's Horse) embarked for South Africa on 16/17 March 1900.[142] They remained until May 1902.[143] With approximately 7,368[144] soldiers in a combat situation, the conflict became the largest military engagement involving Canadian soldiers from the time of Confederation until the Great War.[143] Eventually, 270 of these soldiers died in the course of the Boer War.[143]
As one of the country's first major wars, the arrival and movement of troops was widely documented by early war photographers. English-born (and later Canadian) Inglis Sheldon-Williams was one of the most notable, documenting the movement of hundreds of troops between North America and Southern Africa.[145]
The Canadian public was initially divided on the decision to go to war as some citizens did not want Canada to become Britain's 'tool' for engaging in armed conflicts. Many Anglophone citizens were pro-Empire, and wanted the prime minister, Sir Wilfrid Laurier, to support the British in their conflict. On the other hand, many Francophone citizens felt threatened by the continuation of British imperialism to their national sovereignty.[146]
In the end, to appease the citizens who wanted war and to avoid angering those who oppose it, Laurier sent 1,000 volunteers under the command of Lieutenant Colonel William Otter to aid the confederation in its war to 'liberate' the peoples of the Boer controlled states in South Africa. The volunteers were provided to the British if the latter paid costs of the battalion after it arrived in South Africa.[147]
The supporters of the war claimed that it "pitted British Freedom, justice and civilization against Boer backwardness".[citation needed][148] The French Canadians' opposition to the Canadian involvement in a British 'colonial venture' eventually led to a three-day riot in various areas of Quebec.[144]

Commonwealth involvement in the Boer War can be summarised into three parts. The first part (October 1899 – December 1899) was characterised by questionable decisions and blunders from the Commonwealth leadership which affected its soldiers greatly. The soldiers of the Commonwealth were shocked at the number of Afrikaner soldiers who were willing to oppose the British. The Afrikaner troops were very willing to fight for their country and were armed with modern weaponry and were highly mobile soldiers.[146] This was one of the best examples of Guerrilla style warfare, which would be employed throughout the twentieth century after set piece fighting was seen as a hindrance by certain groups.[143] The Boer soldiers would evade capture and secure provisions from their enemies therefore they were able to exist as a fighting entity for an indeterminate period of time.[149]
The end of the First part was the period in mid-December, referred to as the "Black Week". During the week of 10–17 December 1899, the British suffered three major defeats at the hands of the Boers at the battlefields of Stormberg, Magersfontein and Colenso. Afterwards, the British called upon more volunteers to take part in the war from the Commonwealth.[150]
The second part of the war (February–April 1900) was the opposite of the first. After the British reorganised and reinforced under new leadership, they began to experience success against the Boer soldiers. Commonwealth soldiers resorted to using blockhouses, farm burning and concentration camps to 'persuade' the resisting Boers into submission.[151]
The final phase of the war was the guerrilla phase in which many Boer soldiers turned to guerrilla tactics such as raiding infrastructure or communications lines. Many Canadian soldiers did not actually see combat after they had been shipped over to South Africa since many arrived around the time of the signing of the Treaty of Vereeniging on 31 May 1902.[152]
India

British garrisons in India contributed 18,534 British officers and men, as well as an estimated 10,000 Indian auxiliaries deployed to assist them. India also sent 7,000 horses, ponies and mules.[158]
Indian auxiliaries were only employed in non-combatant roles.[159]
The Natal Indian Ambulance Corps, created by Gandhi and financed by the local Indian community, served at the battles of Colenso and Spion Kop.[158]
New Zealand

When the Second Boer War seemed imminent, New Zealand offered its support. On 28 September 1899, Prime Minister Richard Seddon asked Parliament to approve the offer to the imperial government of a contingent of mounted rifles, thus becoming the first British Colony to send troops to the Boer War. The British position in the dispute with the Transvaal was "moderate and righteous", he maintained. He stressed the "crimson tie" of Empire that bound New Zealand to the mother-country and the importance of a strong British Empire for the colony's security.[160]
By the time peace was concluded two and a half years later, 10 contingents of volunteers, totalling nearly 6,500 men from New Zealand, with 8,000 horses had fought in the conflict, along with doctors, nurses, veterinary surgeons and a small number of school teachers.[161] Some 70 New Zealanders died from enemy action, with another 158 killed accidentally or by disease.[162] The first New Zealander to be killed was Farrier G.R. Bradford at Jasfontein Farm on 18 December 1899.[163] The Boer War was greeted with extraordinary enthusiasm when the war was over, and peace was greeted with patriotism and national pride.[164] This is best shown by the fact that the Third, Fourth and Fifth contingents from New Zealand were funded by public conscription.[163]
Rhodesia
Rhodesian military units such as the British South Africa Police, Rhodesia Regiment and Southern Rhodesian Volunteers served in the Second Boer War.
South Africa
During the war, the British army also included substantial contingents from South Africa itself. There were large communities of English-speaking immigrants and settlers in Natal and Cape Colony (especially around Cape Town and Grahamstown), which formed volunteer units that took the field, or local "town guards". At one stage of the war, a "Colonial Division", consisting of five light horse and infantry units under Brigadier General Edward Brabant, took part in the invasion of the Orange Free State] Part of it withstood a siege by Christiaan de Wet at Wepener on the borders of Basutoland. Another large source of volunteers was the uitlander community, many of whom hastily left Johannesburg in the days immediately preceding the war.

Later during the war, Kitchener attempted to form a Boer Police Force, as part of his efforts to pacify the occupied areas and effect a reconciliation with the Boer community. The members of this force were despised as traitors by the Boers still in the field. Those Boers who attempted to remain neutral after giving their parole to British forces were derided as "hensoppers" (hands-uppers) and were often coerced into giving support to the Boer guerrillas (which formed one of the reasons for the British decision to launch scorched earth campaigns throughout the countryside and detain Boers in concentration camps in order to deny anything of use to the Boer guerrillas).[citation needed]
Like the Canadian and particularly the Australian and New Zealand contingents, many of the volunteer units formed by South Africans were "light horse" or mounted infantry, well suited to the countryside and manner of warfare. Some regular British officers scorned their comparative lack of formal discipline, but the light horse units were hardier and more suited to the demands of campaigning than the overloaded British cavalry, who were still obsessed with the charge by lance or sabre.[i] At their peak, 24,000 South Africans (including volunteers from the Empire) served in the field in various "colonial" units. Notable units (in addition to the Imperial Light Horse) were the South African Light Horse, Rimington's Guides, Kitchener's Horse and the Imperial Light Infantry.[citation needed]
Notable participants
Boer leaders
- Louis Botha
- Philip Botha
- Schalk Willem Burger
- Piet Cronjé
- Piet Joubert
- Koos de la Rey
- Paul Kruger
- Marthinus Prinsloo
- Jan Smuts
- Martinus Theunis Steyn
- Christiaan de Wet
United Kingdom and empire
Military leaders
- Redvers Buller
- Robert Baden-Powell, 1st Baron Baden-Powell
- Douglas Haig, 1st Earl Haig
- John French, 1st Earl of Ypres
- Herbert Kitchener, 1st Earl Kitchener
- Frederick Roberts, 1st Earl Roberts
Civilians and other combatants
Harold Lothrop Borden - son of Canada's Canadian Minister of Defence and Militia, Frederick William Borden. Serving in the Royal Canadian Dragoons, he became the most famous Canadian casualty of the Second Boer War.[165] Queen Victoria asked F. W. Borden for a photograph of his son, Prime Minister Wilfrid Laurier praised his services, tributes arrived from across Canada, and in his home town Canning, Nova Scotia, there is a monument (by Hamilton MacCarthy) erected to his memory.[165]

Sam Hughes – Senior Militia officer and later a Federally elected cabinet minister. Hughes became involved in the Boer war as a member of Brigadier-General Herbert Settle's expedition after Hughes unsuccessfully tried to raise his own brigade of soldiers.[151] However, Hughes was dismissed and was sent home in the summer of 1900 for; sending letters back home which were published outlining British command incompetence, his impatience and boastfulness and his providing surrendering enemies favourable conditions. Hughes later became the Canadian Minister of Defence and Militia in 1911, just prior the outbreak of World War I.[166]
John McCrae – Best known as the author of the World War I poem In Flanders Fields, McCrae started his active military service in the Boer War as an artillery officer. After completing several major campaigns, McCrae's artillery unit was sent home to Canada in 1901 with what would be referred to today as an 'honourable discharge'. McCrae ended up becoming a special professor in the University of Vermont for pathology and he would later serve in World War I as a Medical officer until his death from pneumonia while on active duty in 1918.[167]
Harry "Breaker" Morant – Australian soldier who, as a commanding officer, was accused of participation in summary executions of Boer prisoners and the killing of a German missionary who had been a witness to the shootings. Morant was found guilty along with Peter Handcock and George Witton at their court-martial, with the two former being executed and the latter's sentence commuted, and later released from British prison to return to Australia after sustained public pressure to do so.[168]

Winston Churchill – Best known as the prime minister of Britain. During the main part of the Second Boer War, Churchill worked as a war correspondent for The Morning Post. At the age of twenty-six,[169] he was captured and held prisoner in a camp in Pretoria from which he escaped and rejoined the British army. He received a commission in the South African Light Horse (still working as a correspondent) and witnessed the capture of Ladysmith and Pretoria.[170]
Mahatma Gandhi – Best known as the leader of the independence movement in India, he lived in South Africa 1893–1915 where he worked on behalf of Indians. He volunteered in 1900 to help the British by forming teams of ambulance drivers and raising 1100 Indian volunteer medics. At Spioenkop Gandhi and his bearers had to carry wounded soldiers for miles to a field hospital because the terrain was too rough for the ambulances. General Redvers Buller mentioned the courage of the Indians in his dispatch. Gandhi and thirty-seven other Indians received the War Medal.[171]
Sir Arthur Conan Doyle – Author and creator of Sherlock Holmes. Served as a volunteer doctor in the Langman Field Hospital at Bloemfontein between March and June 1900. In his widely distributed and translated pamphlet 'The War in South Africa: Its Cause and Conduct' he justified both the reasonings behind the war and handling of the conflict itself. In response to complaints about concentration camps he pointed out that over 14,000 British soldiers had died of disease during the conflict (as opposed to 8,000 killed in combat) and at the height of epidemics he was seeing 50–60 British soldiers dying each day in a single ill-equipped and overwhelmed military hospital.[172]
James Craig, 1st Viscount Craigavon – Future Prime Minister of Northern Ireland. Served as a captain in the 3rd Battalion of the Royal Irish Rifles and as part of the 13th battalion of the Imperial Yeomanry. He was captured in 1900 but released due to a perforated colon and served as a deputy assistant director of the Imperial Military Railways until being evacuated to the UK due to ill-health.[173][174][175][176][177]
Frederick Russell Burnham – American scout and adventurer who frequently assisted the British in Africa, Burnham was prospecting in the Klondike at the time of the war's outbreak and originally was not intending to take part. However, a note from Lord Roberts reached him in Alaska, asking him to take on the role of Chief Scout of Roberts' staff if he should so choose. Burnham, on the other side of the globe, hurried to Africa and was commissioned a captain in the British army (a highly unusual practice given that Burnham was an American citizen, not a British subject). Burnham arrived at the front just before the Battle of Paardeberg and spent most of his time behind Boer lines gathering information and sabotaging railroads. Burnham was captured and escaped by the Boers twice[178] and severely wounded at one point.[179]
Final overview

The Second Boer War was the harbinger of a new type of combat which would persevere throughout the twentieth century, guerrilla warfare.[143] After the war was over, the entire British army underwent a period of reform which was focused on lessening the emphasis placed on mounted units in combat.[180] It was determined that the traditional role of cavalry was antiquated and improperly used on the battlefield in the modern warfare of the Boer War, and that the First World War was the final proof that mounted attacks had no place in twentieth century combat.[180] Cavalry was put to better use after the reforms in the theatres of the Middle East and World War I, and the idea of mounted infantry was useful in the times when the war was more mobile.[180] An example was during the First World War during the Battle of Mons in which the British cavalry held the Belgian town against an initial German assault. Another was the use of mounted infantry at the Battle of Megiddo (1918) in which Allenby's force routed the enemy owing to speed and dexterity of arms.[181]
The Canadian units of the Royal Canadian Dragoons and the Royal Canadian Mounted Rifles fought in the First World War in the same role as the Boer War. However, during, and after, the Second World War the regiments swapped their horses for mechanised vehicles.[182] It was also the beginning of types of conflict involving machine guns, shrapnel and observation balloons which were all used extensively in the First World War.[143] To the Canadians however, attrition was the leading cause of death in the Second Boer War, with disease being the cause of approximately half of the Canadian deaths.[183]
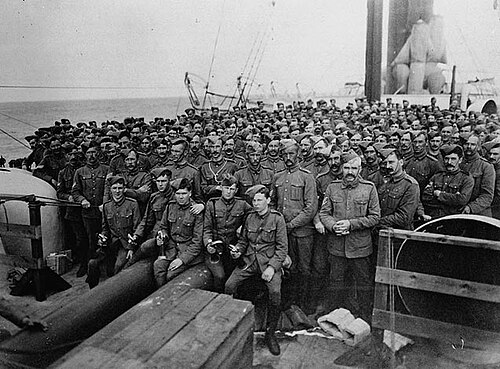
Both sides used a scorched Earth policy to deprive the marching enemy of food. And both had to corral civilians into makeshift huts by 'concentrating' them into camps.[146] For example, at Buffelspoort, British soldiers were held in captivity in Boer encampments after surrendering their arms, and civilians were often mixed in with service personnel because the Boers did not have the resources to do otherwise. A total of 116,000 women, children and Boer soldiers were confined to the Commonwealth concentration camps, of which at least 28,000, mainly women and children, would die.[157] The lack of food, water, and sanitary provisions was a feature of 20th-century warfare for both civilians and armed services personnel, yet one consequence of the Boer War and investigative commissions was the implementation of The Hague Convention (1899)[how?] and Geneva Convention (1904); of which there were many further agreements thereafter.[citation needed]
Views on British tactics
The British saw their tactics of scorched earth and concentration camps as a legitimate way of depriving the Boer guerrillas of supplies and safe havens.[184] The Boers saw them as a British attempt to coerce the Boers into surrender,[185] with the camp inmates—mainly families of Boer fighters—seen as deliberately kept in poor conditions to encourage high death rates.[186] Even in 2019, the controversy around the British tactics continued to make headlines.[187]
Commemorations
The Australian National Boer War Memorial Committee organises events to mark the war on 31 May each year. In Canberra, a commemorative service is usually held at the St John the Baptist Church in Reid. Floral tributes are laid for the dead.[188]
See also
- Bloemfontein Conference
- Treaty of Vereeniging
- Bombardment in the Second Boer War
- British logistics in the Boer War
- First Italo–Ethiopian War
- List of Second Boer War Victoria Cross recipients
- List of wars between democracies
- London to Ladysmith via Pretoria
- History of South Africa
- Military history of South Africa
- Volkstaat
- First Boer War
- Scramble for Africa
Notes
- ^ Before Federation in 1901, Australian involvement in the war consisted of forces from the following separate colonies:
- ^ Larger numbers of volunteers came from the Netherlands, Germany and Sweden-Norway. Smaller forces came from Ireland, Italy, Congress Poland, France, Australia, Belgium, Russia, the United States, Denmark and Austria-Hungary.
- ^ 5,774 killed in battle; 2,108 died of wounds; 14,210 died of disease[6]
- ^ 3,990 killed in battle; 157 died in accidents; 924 of wounds and disease; 1,118 while prisoners of war.[7]
- ^ Salisbury felt that the Transvaal, the Orange Free State, and Cape Boers aspired to a "Dutch South Africa". The achievement of such a state would damage British imperial prestige
- ^ From the "Battle of Magersfontein", verse by Private Smith of the Black Watch December 1899. (Quoted in Pakenham (1979)[21]: 115
- ^ "Although some 30,000 Irishmen served in the British Army under Irish General Lord Frederick Roberts, who had been Commander of Chief of British Forces in Ireland prior to his transfer to South Africa, some historians argue that the sympathies of many of their compatriots lay with the Boers. Nationalist-controlled local authorities passed pro-Boer resolutions and there were proposals to confer civic honours on Boer leader, Paul Kruger." (Irish Ambassador Daniel Mulhall written for History Ireland, 2004.)
- ^ Lloyd George and Keir Hardie were members of the Stop the War Committee (See the founder's biography: William T. Stead's.) Many British authors gave their "Pro-Boer" opinions in British press, such as G. K. Chesterton's writing to 1905 – (see Rice University Chesterton's poetry analysis)
- ^ British cavalry travelled light compared with earlier campaigns, but were still expected to carry all kit with them on campaign owing to distances covered on the Veldt.

.svg/500px-Flag_of_Western_Australia_(1870%E2%80%931953).svg.png)

.svg/500px-Flag_of_South_Australia_(1876%E2%80%931904).svg.png)
.svg/500px-Flag_of_Victoria_(1877-1901).svg.png)

References
- ^ Jones, Huw M. (October 1999). "Neutrality compromised: Swaziland and the Anglo–Boer War, 1899–1902". Military History Journal. 11 (3/4). Archived from the original on 22 December 2015. Retrieved 19 August 2010.
- ^ Grattan, Robert (2009). "The Entente in World War I: a case study in strategy formulation in an alliance". Journal of Management History. 15 (2): 147–158. doi:10.1108/17511340910943796.
- ^ Haydon, A.P. (1964). "South Australia's first war". Australian Historical Studies. 11 (42).
- ^ a b sahoboss (31 March 2011). "Role of Black people in the South African War".
- ^ Scholtz, Leopold (2005). Why the Boers Lost the War. Basingstoke: Palgrave-Macmillan. pp. 2–5, 119. ISBN 978-1-4039-4880-9.
- ^ Eveleigh Nash 1914, p. 309.
- ^ a b c Wessels 2011, p. 79.
- ^ The Illustrated London News 1899-10-28: Vol 115 Iss 3158. Internet Archive. Illustrated London News. 28 October 1899.
{{cite book}}: CS1 maint: others (link) - ^ Millard, Candice (2016). Hero of the Empire: The Boer War, a daring escape, and the making of Winston Churchill. New York: Doubleday. ISBN 978-0-385-53573-1.
- ^ "The South African War 1899–1902". sahistory.org.za. South African History Online. Retrieved 25 January 2021.
- ^ a b "Lord Roberts is appointed British supreme commander in South Africa". sahistory.org.za. South African History Online. Retrieved 4 January 2022.
- ^ Biggins, David (June 2013). "Khaki Election of 1900". angloboerwar.com. Retrieved 27 November 2018.
- ^ van der Waag, Ian (2005). "Boer Generalship and Politics of Command". War in History. 12 (1): 15–43. doi:10.1191/0968344505wh306oa. JSTOR 26061736. S2CID 220749361 – via Jstor.
- ^ a b "Women & Children in White Concentration Camps during the Anglo–Boer War, 1900–1902". sahistory.org.za. South African History Online. 21 March 2011. Retrieved 20 February 2019.
- ^ "Boer War begins in South Africa". History.com. Retrieved 23 July 2020.
- ^ "BBC – History – The Boer Wars". BBC. Retrieved 25 January 2021.
- ^ "The Boer War ends in South Africa". History.com. Retrieved 25 January 2021.
- ^ "Anglo Boer War – Rhodesia Regiment". angloboerwar.com. Retrieved 15 July 2020.
- ^ Diver, Luke (2014). "Ireland and the Second Boer" (PDF). Archived (PDF) from the original on 9 October 2022. Retrieved 15 December 2020.
- ^ Riches, Christopher; Palmowski, Jan, eds. (2021). "United Kingdom". A Dictionary of Contemporary World History (6th ed.). Oxford University Press. ISBN 978-0-19-189094-9. Retrieved 2 May 2021.
- ^ a b c d e f g h i j k l Pakenham, Thomas (1979). The Boer War. New York: Random House. ISBN 0-394-42742-4.
- ^ a b c d e f g h Wessels, André (2000). "Afrikaners at War". In Gooch, John (ed.). The Boer War: Direction, Experience and Image. London: Cass.
- ^ Clodfelter, Micheal (2017). Warfare and armed conflicts: a statistical encyclopedia of casualty and other figures, 1492–2015 (4th ed.). Jefferson, North Carolina: McFarland & Company, Inc., Publishers. ISBN 978-0-7864-7470-7.
- ^ Gronum 1977.
- ^ South African History Online 2011.
- ^ a b Pretorius, Fransjohan (18 March 2008). "History – The Boer Wars". BBC. Archived from the original on 7 April 2020. Retrieved 28 August 2019.
- ^ Keegan, Timothy (1996). Colonial South Africa and the Origins of the Racial Order (1996 ed.). David Philip Publishers (Pty) Ltd. pp. 15–37. ISBN 978-0-8139-1735-1.
- ^ a b Greaves, Adrian (2013). The Tribe that Washed its Spears: The Zulus at War. Barnsley: Pen & Sword Military. pp. 36–55. ISBN 978-1-62914-513-6.
- ^ a b Morris & Linnegar 2004, pp. 58–95.
- ^ Entry: Cape Colony. Encyclopædia Britannica Volume 4 Part 2: Brain to Casting. Encyclopædia Britannica, Inc. 1933. James Louis Garvin, editor.
- ^ Colenbrander, Herman (2010) [1902]. De Afkomst Der Boeren [The Origin of the Peasants] (in Dutch). Kessinger Publishing. ISBN 978-1167481994..
- ^ Giliomee, Hermann (1991). The Creation of Tribalism in Southern Africa. Berkeley: University of California Press. pp. 21–28. ISBN 978-0-520-07420-0.
- ^ a b Grant, Neil (2015). Mauser Military Rifles. Bloomsbury Publishing. p. 37. ISBN 978-1-4728-0595-9.
- ^ a b A Handbook of the Boer War. London: Gale and Polden. 1910. ISBN 978-1-374-97455-5.
- ^ Yap & Leong Man 1996, p. 134.
- ^ Measuringworth 2015, Relative Value of a UK Pound Amount – average earnings, retrieved on 27 January 2011
- ^ Cartwright 1964, p. [page needed].
- ^ Nathan 1941, p. [page needed].
- ^ Machanik, Felix. "Firearms and Firepower – First War of Independence, 1880–1881 – Journal". South African Military History Society. Retrieved 28 August 2019.
- ^ a b Smith-Christmas, Kenneth L. (1 June 2016). "The Guns of the Boer Commandos". American Rifleman. Archived from the original on 14 March 2020. Retrieved 28 August 2019.
- ^ Bester 1994, p. [page needed]
- ^ a b Scarlata, Paul (17 April 2017). "6 Rifles Used by the Afrikaners During the Second Boer War". Tactical Life Gun Magazine. Retrieved 28 August 2019.
- ^ Pretorius, Fransjohan (1999). Life on Commando during the Anglo–Boer War 1899–1902. Human & Rousseau. p. 81. ISBN 978-0-7981-3808-6.
- ^ Muller, C. F. J. (1986). Five Hundred Years: A History of South Africa. Academica. p. 330. ISBN 978-0-86874-271-7.
- ^ Grant, Neil (2015). Mauser Military Rifles. Bloomsbury Publishing. p. 39. ISBN 978-1-4728-0595-9.
- ^ Gooch, John (2013). The Boer War: Direction, Experience and Image. Taylor & Francis. p. 98. ISBN 978-1-135-27181-7.
- ^ Lunderstedt, Steve (2000). From Belmont to Bloemfontein: the western campaign of the Anglo–Boer War, February 1899 to April 1900. Diamond Fields Advertiser. p. 22. ISBN 978-0-620-26099-2.
- ^ Horn, Bernd (2012). Doing Canada Proud: The Second Boer War and the Battle of Paardeberg. Dundurn. p. 56. ISBN 978-1-4597-0578-4.
- ^ Krott, Rob (14 March 2014) [2002]. "South Africa's National Museum of Military History". SmallArmsReview.com. Archived from the original on 20 March 2020. Retrieved 28 August 2019.
- ^ Zuehlke, Mark (15 May 2017). "Canada's first foreign war". Legion Magazine. Archived from the original on 11 February 2020. Retrieved 28 August 2019.
- ^ Connolly, C. N. (1 April 1978). "Manufacturing 'spontaneity': The Australian offers of troops for the Boer War". Historical Studies. 18 (70): 106–117. doi:10.1080/10314617808595579. ISSN 0018-2559.
- ^ Crowhurst, Peter. "Lord Salisbury". britishempire.me.uk. Retrieved 8 April 2020.
- ^ a b c d Steele, David (2000). "Salisbury and the Soldiers". In Gooch, John (ed.). The Boer War: Direction, Experience and Image. London: Cass.
- ^ Jeffery 2000, p. 145 cites Inglis 1974, pp. 53–55
- ^ Surridge 2000, p. 24.
- ^ Guyot. Boer Politics.
- ^ Walker, A History of Southern Africa, p. 480
- ^ a b c d Ash, Chris (2020). The Boer War Atlas. Durban: 30 Degrees South. ISBN 978-1-928359-83-8.
- ^ Dunlop, Colonel John K., The Development of the British Army 1899–1914, London, Methuen (1938) p. 72.
- ^ Searle 2004, p. 276.
- ^ Field Marshal Lord Carver, The Boer War, pp. 259–262
- ^ 'Historical Overview' in Antony O'Brien, Bye-Bye Dolly Gray
- ^ Pakenham 1991a, p. 573.
- ^ Paterson, Andrew Barton (2000). Droogleever, R. W. F. (ed.). From the Front: Dispatches from the Boer War. Pan Macmillan. ISBN 978-0-7329-1062-4.
- ^ Wilcox 2002, pp. 84–85.
- ^ Speed, Neil G. (2002). Born to fight : Major Charles Joseph Ross DSO, a definitive study of his life. Melbourne: Caps & Flints Press. ISBN 0-9581356-0-6. OCLC 61567917.
- ^ a b Changuion, Louis A. (2022). Vasgevang! Die lewe van die Boere in die Suid-Afrikaanse krygsgevangenekampe gedurende die Anglo-Boereoorlog, 1899–1902 (in Afrikaans). Centurion, South Africa: Kraal Uitgewers. p. 12. ISBN 9781990915116.
- ^ a b "Anglo–Boer War Philatelic Society: Collecting Interests". Archived from the original on 10 December 2005.
- ^ "Saint Helena Island Info: All about St Helena, in the South Atlantic Ocean • Boer Prisoners (1900–1902)". Burgh House Software.
- ^ Harman, Mike (6 March 2017). "POW camps in Ceylon during the Boer war". libcom.org. Archived from the original on 30 June 2019. Retrieved 8 April 2020.
- ^ "Anglo Boere Oorlog/Boer War (1899–1902) Prisoners Of War genealogy project". geni_family_tree. Retrieved 8 April 2020.
- ^ Cameron 1986, p. 207.
- ^ Blake 2010, p. 46.
- ^ a b c Jones 1996
- ^ Pakenham 1991, p. 571.
- ^ Blake 2010, p. 140.
- ^ Ploeger1985, pp. 15–22.
- ^ Marsh 1994, pp. 483–485.
- ^ Davidson & Filatova 1998, p. 80.
- ^ O'Brien 1988, p. [page needed].
- ^ Grundlingh 1980, pp. 258–278.
- ^ Warwick 1983, p. [page needed].
- ^ Pretorius 2011, p. [page needed].
- ^ Hasian, Marouf (2003). "The "hysterical" Emily Hobhouse and Boer War concentration camp controversy". Western Journal of Communication. 67 (2). Informa UK Limited: 138–163. doi:10.1080/10570310309374764. ISSN 1057-0314. S2CID 152156450.
- ^ a b "Black Concentration Camps during the Anglo–Boer War 2, 1900–1902 | South African History Online". sahistory.org.za. Retrieved 1 September 2021.
- ^ "BBC - History - The Boer Wars". www.bbc.co.uk. Retrieved 28 May 2024.
- ^ Wessels 2010, p. 32.
- ^ "Black victims in a white man's war". The Guardian. 10 October 1999. Retrieved 1 September 2021.
- ^ "To fully reconcile The Boer War is to fully understand the 'Black' Concentration Camps by Peter Dickens (The Observation Post), | South African History Online". sahistory.org.za. Retrieved 1 September 2021.
- ^ Judd & Surridge 2013, p. 195.
- ^ Sibbald 1993, pp. 227–232.
- ^ "Miscellaneous information: Cost of the war". AngloBoerWar.com. 2015. Retrieved 12 September 2015.
- ^ Measuringworth 2015.
- ^ "Inflation calculator". bankofengland.co.uk. Retrieved 27 April 2023.
- ^ Leach, Charles (2012). The Legend of Breaker Morant is Dead and Buried: A South African Version of the Bushveldt Carbineers in the Zoutpansberg, May 1901 – April 1902. Louis Trichardt: Leach Printers & Signs. pp. xxviii–xxix.
- ^ Leach 2012, pp. 98–101
- ^ Arthur Davey (1987), Breaker Morant and the Bushveldt Carbineers, Second Series No. 18. Van Riebeeck Society, Cape Town. Pages 78–82.
- ^ Leach 2012, pp. 17–22, 99
- ^ Leach 2012, pp. 22–23, 99
- ^ Leach 2012, pp. 35–60, 100
- ^ Leach 2012, pp. 61–72, 100
- ^ Leach 2012, pp. 62–68, 73–82, 100
- ^ Leach 2012, pp. 83–86, 100
- ^ Leach 2012, pp. 87–90, 100–101
- ^ Leach 2012, pp. 100–101
- ^ Leach 2012, pp. 97–98
- ^ Leach 2012, pp. 104, 106
- ^ a b Leach 2012, p. 105
- ^ Leach 2012, p. 107
- ^ Leach 2012, p. 203
- ^ Leach 2012, pp. 105–107, 203
- ^ a b Leach 2012, pp. 109, 203
- ^ Leach 2012, p. 113
- ^ Davey (1987), page 123.
- ^ Davey (1987), page 122.
- ^ Leach 2012, pp. 54–55
- ^ Leach 2012, pp. 105–109
- ^ Leach 2012, p. 110
- ^ Leach 2012, pp. 115–118, 203
- ^ Australian Town and Country Journal (Sydney, NSW) 12 April 1902. https://trove.nla.gov.au/newspaper/article/71522700#titleModal
- ^ Silvester, John (18 October 2009). "Rest in Peace?". The Sydney Morning Herald.
- ^ Onselen 1982, p. [page needed].
- ^ Onselen 2003, pp. 483–526.
- ^ Swardt 1998, p. 97.
- ^ Lowry, Donal (1992). "« A Fellowship of Disaffection » : Irish-South African Relations from the Anglo-Boer War to the Pretoriastroika 1902-1991". Etudes irlandaises. 17 (2): 105–121. doi:10.3406/irlan.1992.1086.
- ^ "The long shadow of the Boer War". New Statesman. 3 June 2020. Retrieved 19 July 2022.
- ^ McElwee 1974, pp. 223–229.
- ^ Sydney Frederick Galvayne, War horses present & future: or, Remount life in South Africa. 1902.
- ^ Hayes, Matthew Horace (1902). Horses on board ship: a guide to their management. London: Hurst and Blackett. pp. 213–214.
- ^ Homan, Philip A. (Spring 2016). "American Horses for the South African War, 1899–1902". Arcadia. No. 2. doi:10.5282/RCC/7418. ISSN 2199-3408. Retrieved 10 July 2024.
- ^ Davis 1900, p. 34.
- ^ Watt 1982.
- ^ Jacson 1908, p. 88.
- ^ Pocock 1917, p. viii fn. 11.
- ^ Farwell 1976.
- ^ Wilcox 2002, p. [page needed].
- ^ "Boer War".
- ^ "Australian Military Statistics". Australian War Memorial. 2008. Archived from the original on 15 May 2008. Retrieved 10 May 2008.
- ^ "Australia and the Boer War, 1899–1902". Australian War Memorial. 2008. Archived from the original on 22 July 2012. Retrieved 10 May 2008.
- ^ Wilcox 2002, p. 103.
- ^ "The Full Story: Claims 50 Aboriginal trackers left behind during the Boer War". Australia: ABC News. 31 May 2010. Retrieved 19 September 2014.
- ^ Chronicle of the 20th Century by John S Bowman
- ^ a b c d e f Webb 2010, pp. 75–90.
- ^ a b Marshall, Robert. "Boer War Remembered". Maclean's. Archived from the original on 4 February 2013.
- ^ Brandon, Laura (2021). War Art in Canada: A Critical History. Art Canada Institute. ISBN 978-1-4871-0271-5.
- ^ a b c Miller, Carman. "South African War". Canadian Encyclopedia. Archived from the original on 23 January 2012.
- ^ Granatstein 2010, p. [page needed].
- ^ "Canada & The South African War, 1899–1902". Canadian War Museum. Retrieved 26 October 2022.
- ^ "The Guerrilla War". Anglo–Boer War Museum.
- ^ Rickard, J. "The Black Week". History of War.
- ^ a b "Canada & The South African War, 1899–1902". Canadian War Museum.
- ^ Cavendish, Richard. "The Peace of Vereeniging". History Today.
- ^ O'Leary 1999.
- ^ a b c Wessels, Elria (2009). "Boers positions in the Klipriviersberg". Veldslae-Anglo–Boereoorlog 1899–1902. Archived from the original on 14 February 2013.
- ^ Stirling 2009.
- ^ a b Chase 2012.
- ^ a b c Pulsifer 2017.
- ^ a b Reddy, E.S. (29 July 1999). "India and the Anglo-Boer War". Retrieved 5 June 2022.
- ^ Itzkin, Eric (May 2009). "The Indian War Memorial: National Memory and Selective Forgetting" (PDF). Archived (PDF) from the original on 9 October 2022. Retrieved 5 June 2022.
- ^ "Brief history – New Zealand in the South African ('Boer') War". New Zealand History Online. 2008. Retrieved 10 May 2008.
- ^ "New Zealand in the South African ('Boer') War". New Zealand History Online. 2008. Retrieved 10 May 2008.
- ^ D.O.W. Hall, (War History Branch, Wellington, 1949).
- ^ a b Pugsley, Christopher (2016). The ANZAC Experience: New Zealand, Australia and Empire in the First World War. Auckland, New Zealand: Oratia. pp. 42–43.
- ^ Phillips, Jock (1990). The Sorrow and the Pride: New Zealand War Memorials. Wellington, New Zealand: GP Books. p. 48.
- ^ a b "Borden, Harold Lothrop". Dictionary of Canadian Biography, Volume XII (1891–1900).
- ^ Duffy 2009.
- ^ Peddie 2009.
- ^ Witton 2003, p. [page needed].
- ^ Pakenham 1991a, p. 568.
- ^ Powell 2015, p. [page needed].
- ^ Desai & Vahed 2015, p. [page needed].
- ^ Miller, Russell. The Adventures of Arthur Conan Doyle. New York: Thomas Dunne Books, 2008. pp. 211–217; ISBN 0-312-37897-1,
- ^ Patrick Buckland (1980). James Craig: Lord Craigavon. Gill and Macmillan. p. 3.
- ^ "No. 27168". The London Gazette. 23 February 1900. p. 1256.
- ^ "No. 27171". The London Gazette. 6 March 1900. p. 1528.
- ^ "The War – Embarcation of Troops". The Times (36078). London. 1 March 1900. p. 7.
- ^ "No. 27475". The London Gazette. 19 September 1902. p. 6024.
- ^ "Taking Sides in the Boer War".
- ^ Burnham, Frederick Russell (1926). Scouting on Two Continents. Garden City, New York: Doubleday, Page & Company. pp. 343–348 ISBN 978-0-86920-126-8.
- ^ a b c Jones, Spencer (2011). "Scouting for Soldiers:Reconnaissance and the British Cavalry 1899–1914". War in History. 18 (4): 495–513. doi:10.1177/0968344511417348. S2CID 110398601.
- ^ Baker, Chris. "Battle of Mons".
- ^ "History of Royal Canadian Dragoons". Archived from the original on 22 November 2012.
- ^ "Canadian casualties in the Boer War". Goldi Productions Ltd.
- ^ Sibbald 1993, p. 214.
- ^ Grundlingh, Albert. "The Bitter Legacy of the Boer War". History Today.
- ^ Barnard, Hennie. "The Concentration Camps 1899–1902". Archived from the original on 3 November 2012. Retrieved 12 November 2012.
- ^ Gous, Nico. "Boer War women, children put in concentration camps 'for own good': British MP sparks outrage".
- ^ "The Australian National Boer War Memorial". bwm.org.au. 31 May 2017. Retrieved 28 August 2019.
Citations
- Berger, Carl (1971). The Sense of Power: Studies in the Ideas of Canadian Imperialism 1867–1914. University of Toronto Press. pp. 233–234. ISBN 978-0-8020-6113-3. OCLC 1036947483. Archived from the original on 27 January 2014.
- Bester, R. (1994). Boer Rifles and Carbines of the Anglo–Boer War. Bloemfontein: War Museum of the Boer Republics.
- Blake, Albert (2010). Boereverraaier [Farmer Traitor] (in Afrikaans). Tafelberg. p. 46.
{{cite book}}: CS1 maint: location missing publisher (link) - "Case Name: Anglo–Boer: Britain's Vietnam (1899–1902)". American University of Washington, D.C., Trade Environment projects. Archived from the original on 27 October 2016. Retrieved 21 July 2016.
- Davidson, Apollon; Filatova, Irina (1998). The Russians and the Anglo–Boer War, 1899–1902. Cape Town: Human & Rousseau. ISBN 0-7981-3804-1.
- Desai, Ashwin; Vahed, Goolem (2015). The South African Gandhi: Stretcher-bearer of Empire. Stanford University Press.
- Chase, Sean (4 November 2012). "Dragoons remember the heroes of Leliefontein". The Daily Observer. Archived from the original on 28 June 2018. Retrieved 12 November 2012.
- Duffy, Michael (22 August 2009). "Sam Hughes Biography". firstworldwar.com.[unreliable source?]
- Cameron, Trewhella, ed. (1986). An Illustrated History of South Africa. Johannesburg: Jonathan Ball. p. 207.
- Cartwright, A. P. (1964). The Dynamite Company. Cape Town: Purnell & Sons.
- Davis, Richard Harding (1900). With Both Armies in South Africa. Charles Scribner Sons. p. 34, fn. 59.
- "Caring for the soldiers health". Nash's war manual. London: Eveleigh Nash. 1914. p. 309.
- Farwell, Byron (March 1976). "Taking Sides in the Boer War". American Heritage Magazine. 20 (3). ISSN 0002-8738. Archived from the original on 7 January 2009.
- Ferguson, Niall (2002). Empire: The Rise and Demise of the British World Order and the Lessons for Global Power. Basic Books. p. 235.
- Grundlingh, Albert (1980). "Collaborators in Boer Society". In Warwick, P. (ed.). The South African War. London. pp. 258–278.
{{cite book}}: CS1 maint: location missing publisher (link) - Granatstein, J.L. (2010). The Oxford Companion to Canadian Military History. Oxford University Press. ISBN 978-0-19-543088-2.
- Grattan, Robert (2009). "The Entente in World War I: a case study in strategy formulation in an alliance". Journal of Management History. 15 (2): 147–158. doi:10.1108/17511340910943796.
- Gronum, M.A. (1977). Die ontplooiing van die Engelse Oorlog 1899–1900 [The Deployment of the English War 1899–1900] (in Afrikaans). Tafelberg. ISBN 978-0-624-01009-8.
- Haydon, A.P. (1964). "South Australia's first war". Australian Historical Studies. 11 (42).
- Inglis, Brian (1974). Roger Casement. London: Coronet Books. pp. 53–55.
- Jeffery, Keith (2000). "The Irish Soldier in the Boer War". In Gooch, John (ed.). The Boer War. London: Cass. p. 145. cites
- Jacson, M. (1908). "II". The Record of a Regiment of the Line. Hutchinson & Company. p. 88. ISBN 1-4264-9111-5.
- Jones, Maurig (1996). "Blockhouses of the Boer War". Colonial Conquest, magweb. Archived from the original on 13 May 2008. Retrieved 10 May 2008.
- Jones, Huw M. (October 1999). "Neutrality compromised: Swaziland and the Anglo–Boer War, 1899–1902". Military History Journal. 11 (3/4). Archived from the original on 22 December 2015. Retrieved 19 August 2010.
- Judd, Denis; Surridge, Keith (2013). The Boer War: A History (2nd ed.). London: I.B. Tauris. ISBN 978-1-78076-591-4.excerpt and text search; a standard scholarly history
- Keppel-Jones, Arthur (1983). Rhodes and Rhodesia: The White Conquest of Zimbabwe, 1884–1902. Montreal, Quebec and Kingston, Ontario: McGill-Queen's University Press. pp. 590–99. ISBN 978-0-7735-0534-6.
- McElwee, William (1974). The Art of War: Waterloo to Mons. London: Purnell. pp. 223–229. ISBN 0-253-31075-X.
- "Relative Value of UK£: using Economic Power in 2014 (using the share of GDP)". Five Ways to Compute the Relative Value of a UK Pound Amount, 1270 to Present. Measuringworth.com. 2015. Retrieved 12 September 2015.
- Marsh, Peter T. (1994). Joseph Chamberlain: Entrepreneur in Politics. Yale University Press. pp. 482–522.
- Meintjes, Johannes (1974). President Paul Kruger: A Biography (First ed.). London: Cassell. ISBN 978-0-304-29423-7.
- Morris, Michael; Linnegar, John (2004). "Chapter 3: Being in Touch". Every Step of the Way: The Journey to Freedom in South Africa. Ministry of Education. pp. 58–95. ISBN 0-7969-2061-3.
- Nasson, Bill (2011). The War for South Africa: The Anglo–Boer War (1899–1902). Abacus. ISBN 978-0349104669.
- Nathan, M. (1941). Paul Kruger: His Life And Times. Durban: Knox.
- O'Brien, P. (1988). The Costs and Benefits of British Imperialism 1846–1914. Past & Present.
- O'Leary, Michael (29 December 1999). "Regimental Rouge – Battles of the Boer War". Regimental Rouge.
- Pakenham, Thomas (1979). The Boer War. New York: Random House. ISBN 0-394-42742-4.
- Peddie, John (22 August 2009). "John McCrae Biography". firstworldwar.com.
- Pocock, Roger S. (1917). Horses. London: J. Murray. p. viii fn. 11. ISBN 0-665-99382-X.
- Powell, Sean-Andre (2015). How Did Winston S. Churchill's Experience As A Prisoner of War: During The Boer War Affect His Leadership Style And Career?. Pickle Partners Publishing.
- Onselen, Charles van (1982). "Chapter 1: New Babylon". Studies in the Social and Economic History of the Witwatersrand, 1886–1914. London: Longman. ISBN 978-0-582-64384-0.
- Onselen, Charles van (October 2003). "'The Modernization of the Zuid Afrikaansche Republiek: F. E. T. Krause, J. C. Smuts, and the Struggle for the Johannesburg Public Prosecutor's Office, 1898–1899". Law and History Review. 21 (3). American Society for Legal History: 483–526. doi:10.2307/3595118. JSTOR 3595118. S2CID 145286422.
- Pakenham, Thomas (1991) [1979]. The Boer War. London: Cardinal. p. 571. ISBN 0-7474-0976-5.
- Pakenham, Thomas (1991a). The Scramble for Africa. Avon Books. p. 573. ISBN 0-380-71999-1.
- Ploeger, Jan (1985). "Burgers in Britse Diens (1902)" [Citizens in British Service]. Scientia Militaria (in Afrikaans). 15 (1): 15–22.
- Pretorius, Fransjohan (2000). "The Experience of the Bitter-Ender Boer". In Gooch, John (ed.). The Boer War: Direction, Experience and Image. London: Cass. p. 179.
- Pretorius, Fransjohan (2011). "Anglo–Boer war". In Jacobs, S.; Johnson, K. (eds.). Encyclopedia of South Africa.
- Pulsifer, Cameron (2017). "For Queen and Country: Canadians and the South African War". Canadian War Museum. Retrieved 2 February 2017.
- Scott, John L. (2007). "British Concentration Camps of the Second South African War (The Transvaal, 1900–1902)".
- "The South African War 1899–1902". South African History Online. 10 November 2011. Retrieved 29 January 2017.
- Searle, G.R. (2004). A new England?: peace and war, 1886–1918. Oxford University Press. pp. 269–307.
- Spies, S.B. (1977). Methods of Barbarism: Roberts and Kitchener and Civilians in the Boer Republics January 1900 – May 1902. Cape Town: Human & Rousseau. p. 265.
- Sibbald, Raymond (1993). The War Correspondents: The Boer War. Bramley Books. ISBN 1-85833-733-X.
- Stirling, John (17 February 2009). "Gordon Highlanders (extract)". Our Regiments in South Africa. Naval and Military Press.
- Surridge, Keith (2000). "Lansdowne at the War Office". In Gooch, John (ed.). The Boer War: Direction, Experience and Image. London: Cass. p. 24.
- Swardt, Eric (1998). "The JJ Potgieter Manuscript" (PDF). p. 97. Archived from the original (PDF) on 16 August 2010. Retrieved 23 August 2009.
- Villiers, J.C. de (June 1984). "The Medical Aspect of the Anglo–Boer War, 1899–1902 Part ll". Military History Journal. 6 (3).[page needed]
- Warwick, Peter (1983). Black People and the South African War, 1899–1902. Cambridge University Press.
- Watt, S (December 1982). "Intombi Military Hospital and Cemetery". Military History Journal. 5 (6). Die Suid-Afrikaanse Krygshistoriese Vereniging/The South African Military History Association.
- Webb, Peter (2010). "The Silent Flag in the New Fallen Snow: Sara Jeannette Duncan and the Legacy of the South African War". Journal of Canadian Studies. 44 (1). University of Toronto Press: 75–90. doi:10.3138/jcs.44.1.75. S2CID 141755145.
- Wessels, André (2000). "Afrikaners at War". In Gooch, John (ed.). The Boer War: Direction, Experience and Image. London: Cass.
- Wessels, André (2010). A Century of Postgraduate Anglo–Boer War (1899–1902) Studies: Masters' and Doctoral Studies Completed at Universities in South Africa, in English-speaking Countries and on the European Continent, 1908–2008. African Sun Media. p. 32. ISBN 978-1-920383-09-1.
- Wessels, André (2011). The Anglo–Boer War 1889–1902: White Man's War, Black Man's War, Traumatic War. African Sun Media. p. 79. ISBN 978-1-920383-27-5.
- Wessels, Elria (2009). "Boers positions in the Klipriviersberg". Veldslae-Anglo–Boereoorlog 1899–1902. Archived from the original on 14 February 2013.
- Wilcox, Craig (2002). Australia's Boer War: The War in South Africa, 1899–1902. Oxford University Press. ISBN 978-0-19-551637-1.
- Witton, George (2003). Scapegoats of the Empire: The True Story of Breaker Morant's Bushveldt Carbineers. excerpt
- Yap, Melanie; Leong Man, Dainne (1996). Colour, Confusion and Concessions: The History of the Chinese in South Africa. Hong Kong: Hong Kong University Press. p. 510. ISBN 9-6220-9423-6.
Historiography
- Krebs, Paula M. (1999). Gender, Race, and the Writing of Empire: Public Discourse and the Boer War. Cambridge UP.
- Seibold, Birgit (2011). Emily Hobhouse and the Reports on the Concentration Camps during the Boer War, 1899–1902: Two Different Perspectives. Columbia UP.
- Van Hartesveldt, Fred R. (2000). The Boer War: Historiography and Annotated Bibliography. Greenwood.
Further reading
- Breytenbach, J. H. (1969–1996). Die Geskiedenis van die Tweede Vryheidsoorlog in Suid-Afrika, 1899–1902 [The History of the Second War of Independence in South Africa, 1899–1902] (in Afrikaans). Pretoria: Die Staatsdrukker.
- Breytenbach, J. H. (1969). Die Boere-offensief, Okt. – Nov. 1899 [The Boer Offensive, Oct. – Nov. 1899]. Die Geskiedenis van die Tweede Vryheidsoorlog in Suid-Afrika, 1899–1902 (in Afrikaans). Vol. I. Pretoria: Die Staatsdrukker. OCLC 798106662.
- Breytenbach, J. H. (1971). Die eerste Britse offensief, Nov. – Des. 1899 [The first British offensive, Nov. – Dec. 1899]. Die Geskiedenis van die Tweede Vryheidsoorlog in Suid-Afrika, 1899–1902 (in Afrikaans). Vol. II. Pretoria: Die Staatsdrukker.
- Breytenbach, J. H. (1973). Die stryd in Natal, Jan. – Feb. 1900 [The battle in Natal, Jan. – Feb. 1900]. Die Geskiedenis van die Tweede Vryheidsoorlog in Suid-Afrika, 1899–1902 (in Afrikaans). Vol. III. Pretoria: Die Staatsdrukker. ISBN 9780797012394. OCLC 612581136.
- Breytenbach, J. H. (1977). Die Boereterugtog uit Kaapland [The Boer retreat from the Cape Colony]. Die Geskiedenis van die Tweede Vryheidsoorlog in Suid-Afrika, 1899–1902 (in Afrikaans). Vol. IV. Pretoria: Die Staatsdrukker.
- Breytenbach, J. H. (1983). Die Britse Opmars tot in Pretoria [The British advance to Pretoria]. Die Geskiedenis van die Tweede Vryheidsoorlog in Suid-Afrika, 1899–1902 (in Afrikaans). Vol. V. Pretoria: Die Staatsdrukker. ISBN 9780621083606. OCLC 769254652.
- Breytenbach, J. H. (1996). Die beleg van Mafeking tot met die Slag van Bergendal [The siege of Mafeking up to the Battle of Bergendal]. Die Geskiedenis van die Tweede Vryheidsoorlog in Suid-Afrika, 1899–1902 (in Afrikaans). Vol. VI. Pretoria: Die Staatsdrukker. ISBN 9780797033214. OCLC 813492747.
- Gooch, John (ed.). The Boer War: Direction, Experience and Image. London: Cass. p. 179. – an anthology frequently cited in this article.
- Murray, Nicholas (2013). The Rocky Road to the Great War: the Evolution of Trench Warfare to 1914. Dulles, Virginia: Potomac Books.
- Ockerbloom, John Mark, ed. (2017). "South African War, 1899–1902". The Online Books Page. – a Boer War bibliography of on-line books.
- British War Office; Maurice, Sir John Frederick; Grant, Maurice Harold (1906–1910). History of the war in South Africa, 1899–1902 (1st in four volumes ed.). – detailed official British history
- volume 1, maps volume 1 (1906)
- volume 2, maps volume 2 (1907)
- volume 3, maps volume 3 (1908)
- volume 4, maps volume 4 (1910)
- Miller, Stephen M. "Politics, the Press, and the Royal Commission on the War in South Africa" International Journal of Military History and Historiography (2022) 44#1 pp. 42–70
- Reitz, Deneys (1929). Commando: A Boer Journal of the Boer War. OCLC 801364049.
- "South African War – Concentration Camps. HC Deb". Hansard. 104 (cc402-67). Parliament of the United Kingdom. 4 March 1902.
External links
 Media related to Second Boer War at Wikimedia Commons
 Quotations related to Second Boer War at Wikiquote
- The Boer War, A 2 part documentary series shown on British television (1999).
- Americanhistoryprojects.com: links to books & articles on Second Boer War
- Scrapbook of Boer War, MSS P 456 at L. Tom Perry Special Collections, Harold B. Lee Library, Brigham Young University
- The Concentration Camps 1899–1902 by Hennie Barnard Archived 23 March 2020 at the Wayback Machine
- British Commanders of the Boer War, Link